One of the more advanced features of the Hava business plan is the ability to create teams.
Teams can be used to create groups of Hava users so they can all access a set of diagrams or data sources.
As the business account owner, you create a team and then invite other Hava users to the team. Once they accept, they will have access to your account and the data sources and diagrams in your account.
To create a team, head to your account settings and the teams option is in the left hand sidebar menu.

From here you can edit or create a new team.
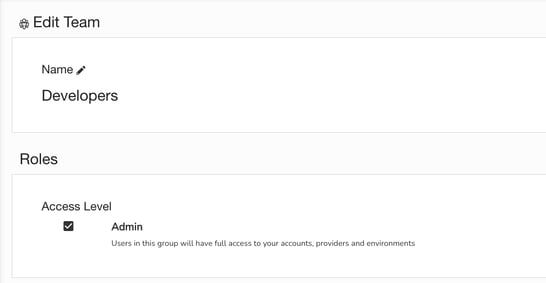
Creating a new team is simple, you give the team a name and select whether the team will have admin level access to your account, data sources and environments.

Once you have created the team, you can then invite other users with a Hava account to the team.

Once a team member has been added to a team, a new drop down menu will appear in their Hava dashboard allowing them to select between using their personal account or swapping to the shared team account.

Further granular control over what a team member can access can be achieved using projects. Sometimes you may need to restrict access for a team to just a single data source or environment that relates to the project they are working on.
The Hava project feature allows you to segregate your data sources into separate projects and then grant project access to team members.
When they switch to the team account (your account), they will see a new 'Projects' drop down.
Any projects they have access to will appear in this drop down. So if you place all your data sources into separate projects, you can control what your team members have access to.

Full details on how to create teams and projects can be found in our help documentation here : https://docs.hava.io/
If you are not using Hava yet to automate your AWS, Azure and GCP cloud network topology diagram generation, you can try it out for free using the button below.


