Auto-scaling is the capability built into AWS that allows you to ensure you have the right number of EC2 instances provisioned to handle the load of your application. Using Auto-scaling, you can remove the guess work in selecting how many EC2 instances are required to provide an acceptable level of performance for your application without over-provisioning resources and incurring unnecessary costs.
When you are running workloads in production it is a good idea to use Amazon CloudWatch to monitor resource usage like CPU utilization, however when desired limits are exceeded, CloudWatch will not automatically provision more resources to handle the increased load, which is where auto-scaling comes into play.
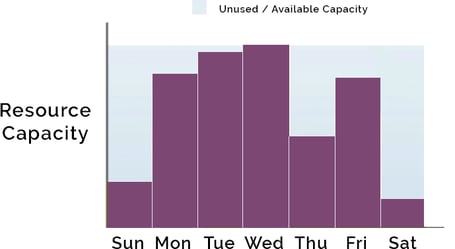
Depending on the nature of your application, it is not uncommon for traffic loads to differ depending on the time of day, or day of the week.
If you provision enough EC2 instances to cope with the highest peak demand, then you will have plenty of other days or time periods where you have lots of capacity that remains unused. Which means you are paying for instances that are laying idle.
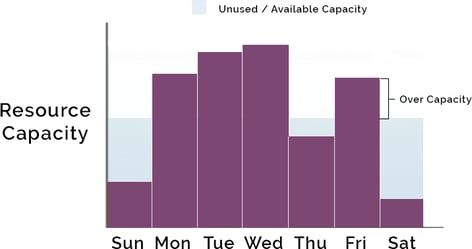
Conversely, if you don’t provision enough capacity, then in peak times when the processing power required to provide acceptable performance is exceeded by demand, then your application performance will degrade and you may have users experiencing severe lag or even time outs due to lack of available cpu capacity.
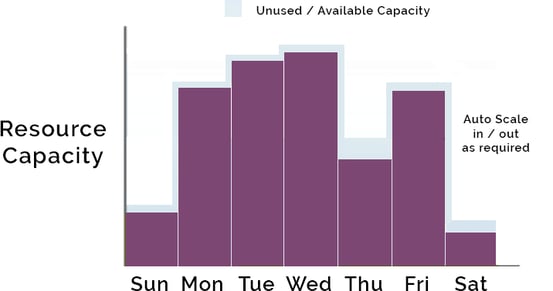
Auto-scaling is the solution, by allowing you to automate the addition and deletion of EC2 instances based on monitored metrics like CPU usage. This allows you to minimise costs during periods of low demand, but ramp up resources during peak load times so application performance is not affected.
Two of the core AWS best practices are scalability and automation. EC2 Auto-scaling provides scalability which addresses the important question around how to ensure your workload has enough EC2 resources to meet fluctuating performance requirements and how you can automate the provisioning process to occur in response to demand.
Auto scaling undertakes the process of scaling out (adding resources) based on increased demand, or scaling in (reducing resources) the number of EC2 instances you have running in your workload based on conditions you define like cpu usage levels or a predefined schedule.
Autoscaling Components.
There are 3 components required for auto scaling.
Launch Configuration
This component relates to what will be launched by your autoscaler. Similar to launching an EC2 instance from the console, you define what AMI (machine image) to use, what instance types to add and which security groups and roles the instances should inherit.
Auto Scaling Group
This component of autoscaling relates to where the autoscaling should take place. Which VPC and subnets to use, what load balancer to attach, what the minimum and maximum number of EC2 instances to scale out and in and the desired capacity.
If you set the minimum instance number to 2, then should the instance count drop below 2 for any reason, the autoscaler will add back instances until the minimum number of EC2 instances are running.
If you set the maximum number of instances to 10, then the autoscaler will keep adding EC2 instances when CPU load warrants it until you hit 10, at which point no additional instances will be added even if CPU load is maxed out.
Auto Scaling Policy
This third component of autoscaling relates to when auto-scaling is in invoked. This can be scheduled like a specific day and time or on-demand based on monitored metrics that will invoke the addition or removal of EC2 instances from your workload.
Dynamic AWS EC2 Autoscaling
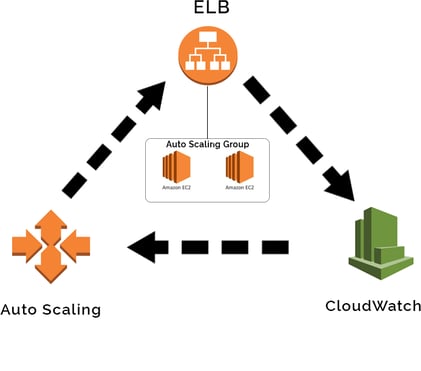 One method of dynamic auto scaling is to use Amazon CloudWatch to trigger auto-scaling when desired thresholds are exceeded.
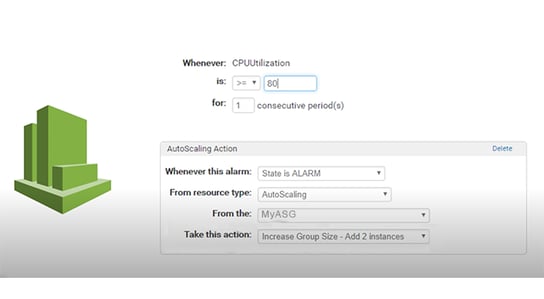
You can trigger actions from the CloudWatch alarm when CPU utilization exceeds or is lower than a pre-defined threshold and you can also define the time period that the out of range condition should persist for. So for instance, if the CPU threshold is greater than 80% for 5 minutes or more, then an auto-scaling action should be performed.
In the above example we trigger the addition of 2 instances to the nominated autoscaling group. You could then set another threshold alarm for when CPU usage dips below say 20% for 5 minutes then a scale in action is taken.
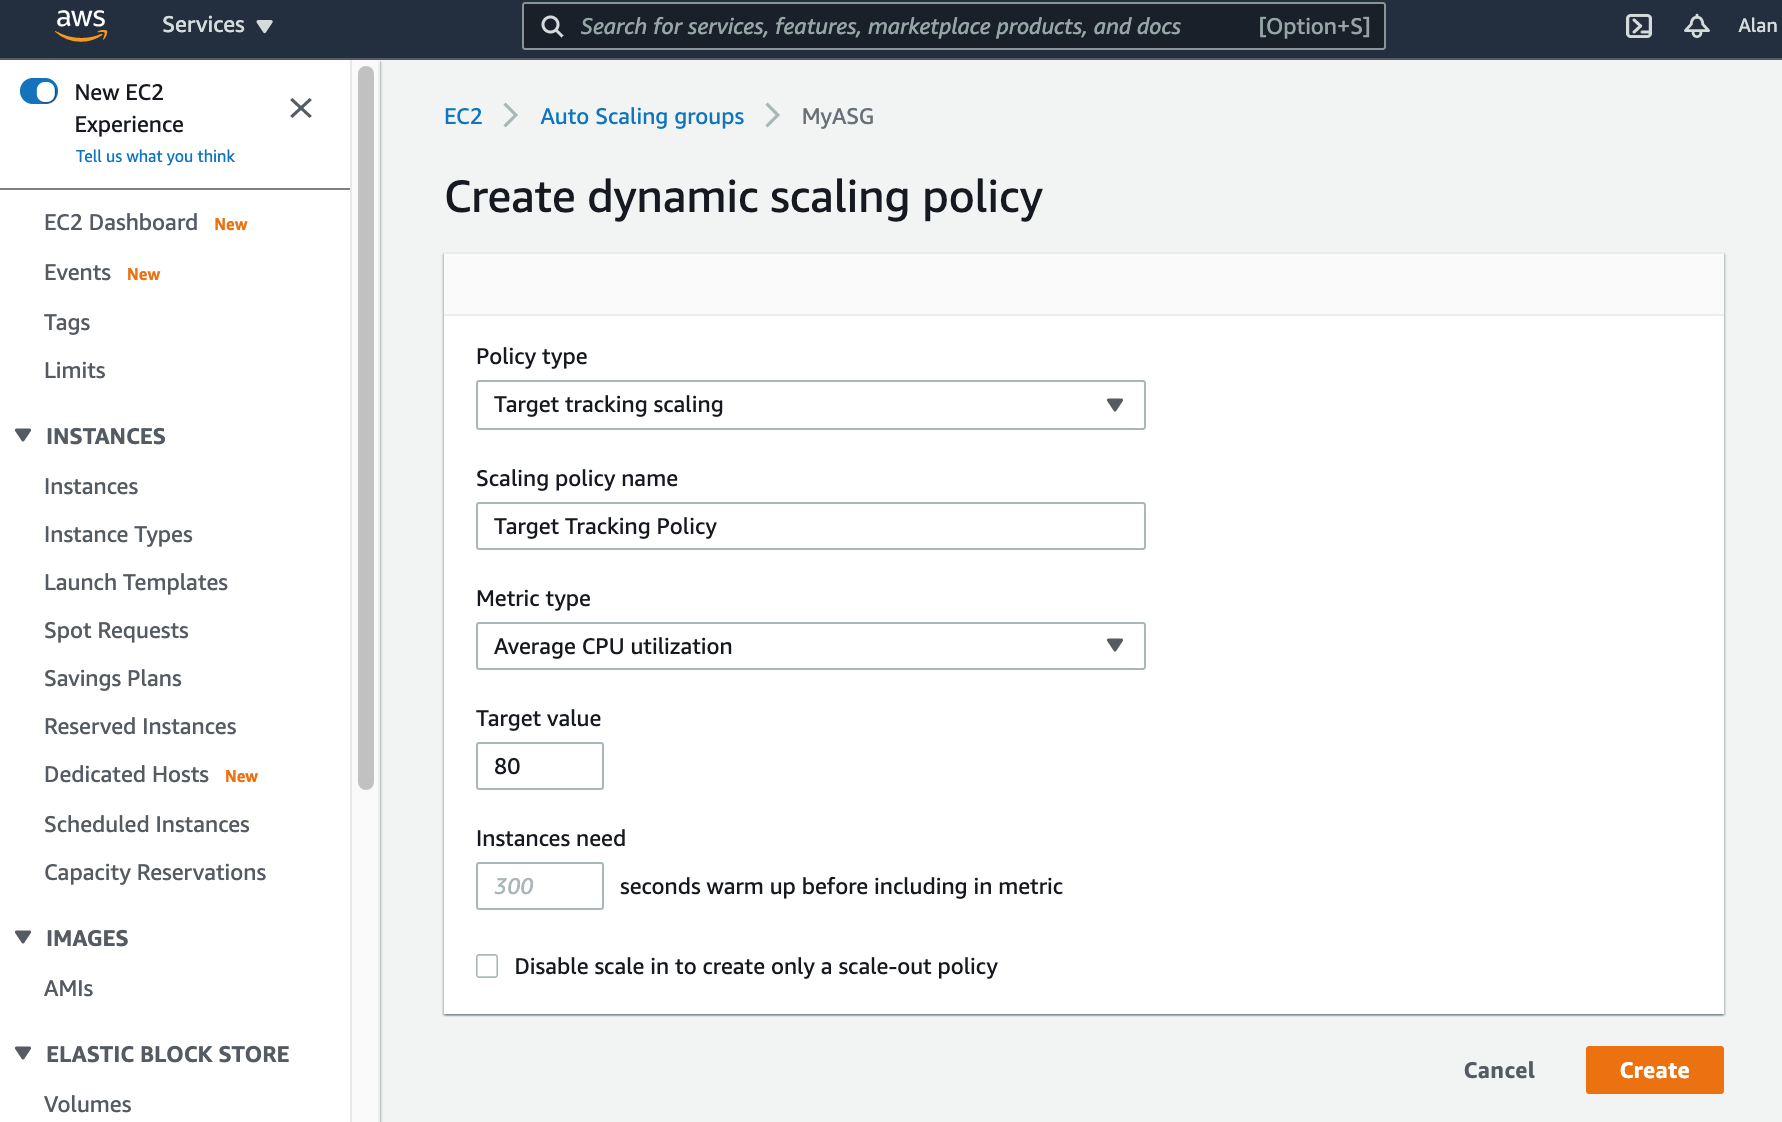
You can also create a Dynamic Scaling Policy when creating the ASG to scale instances in and out based on certain thresholds.
Setting up an AWS EC2 Auto Scaling Group
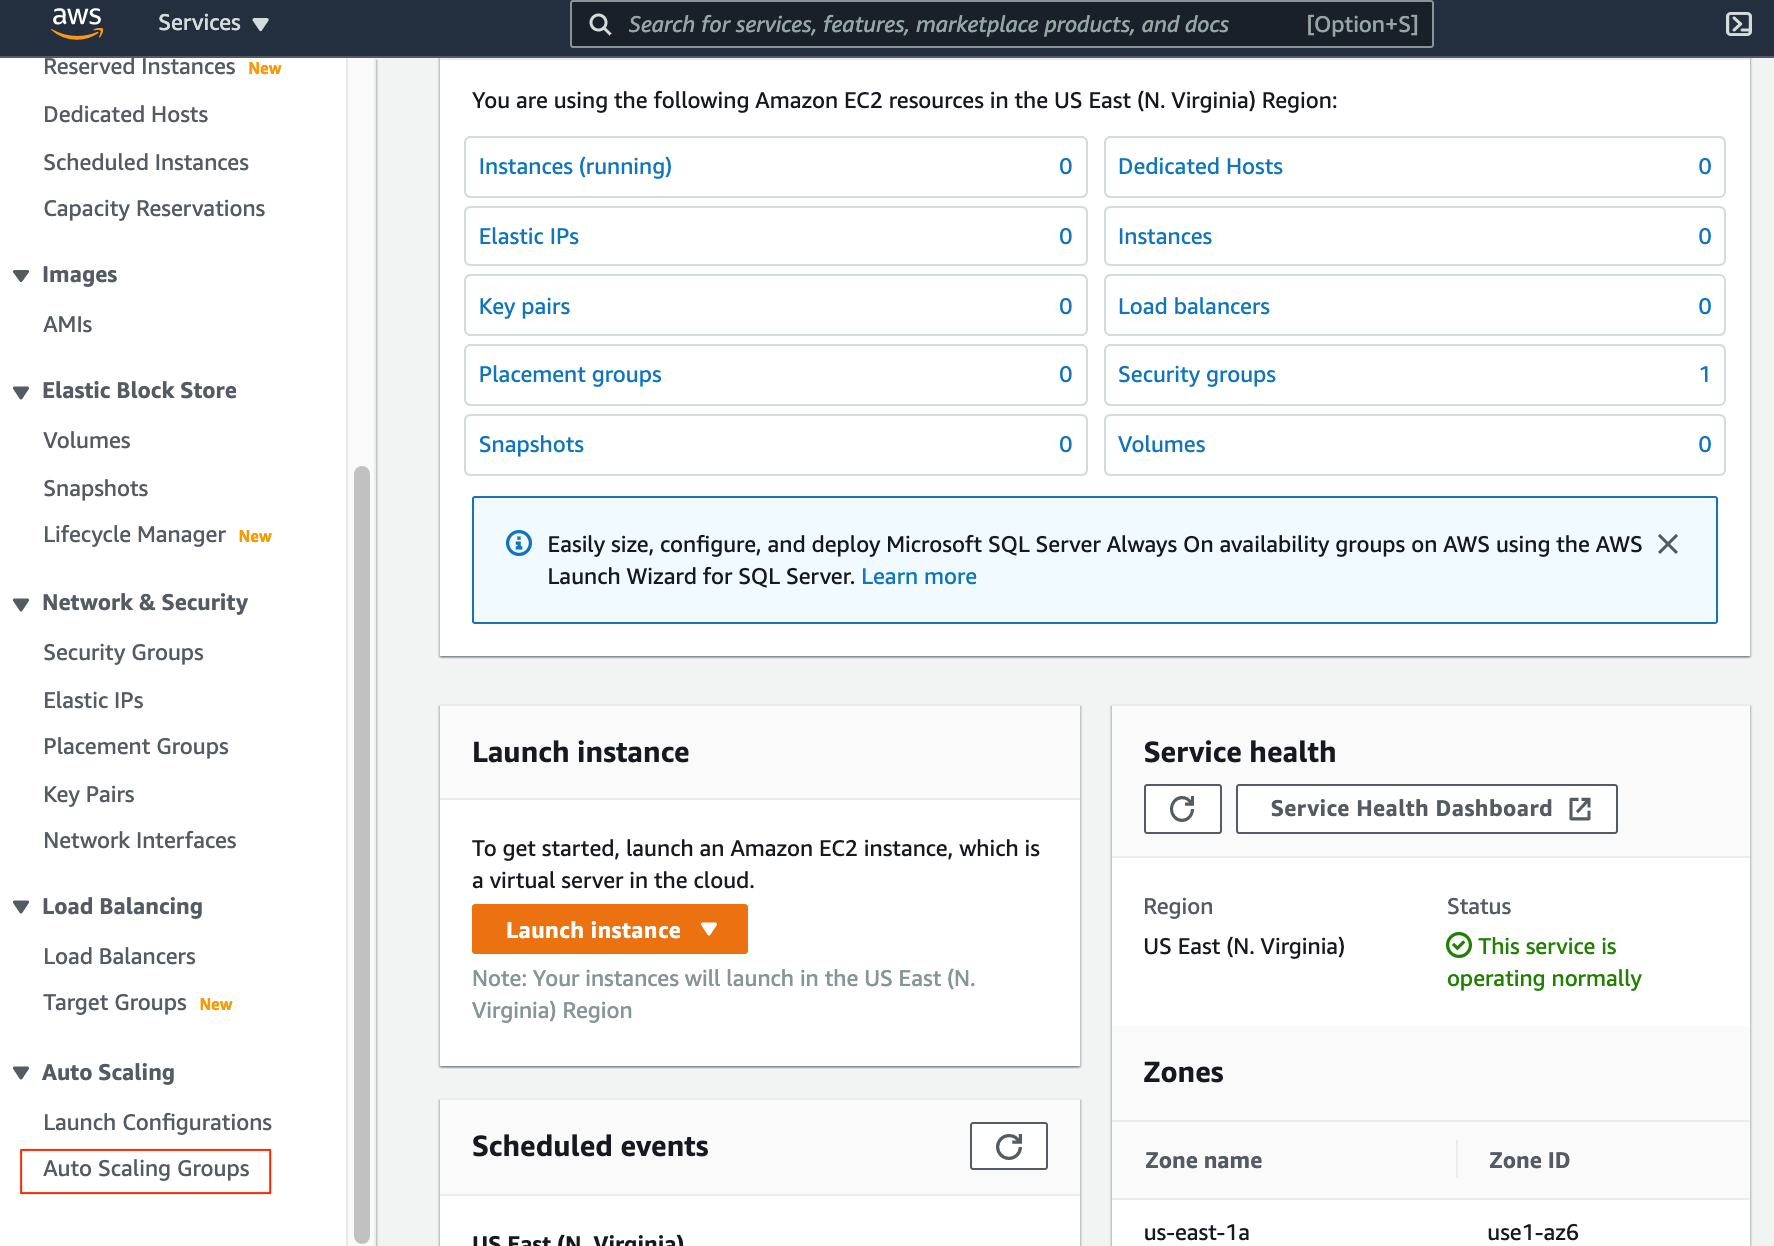
To set up EC2 Autoscaling, you first need to create a new ASG which can be found in the EC2 dashboard of your AWS console.
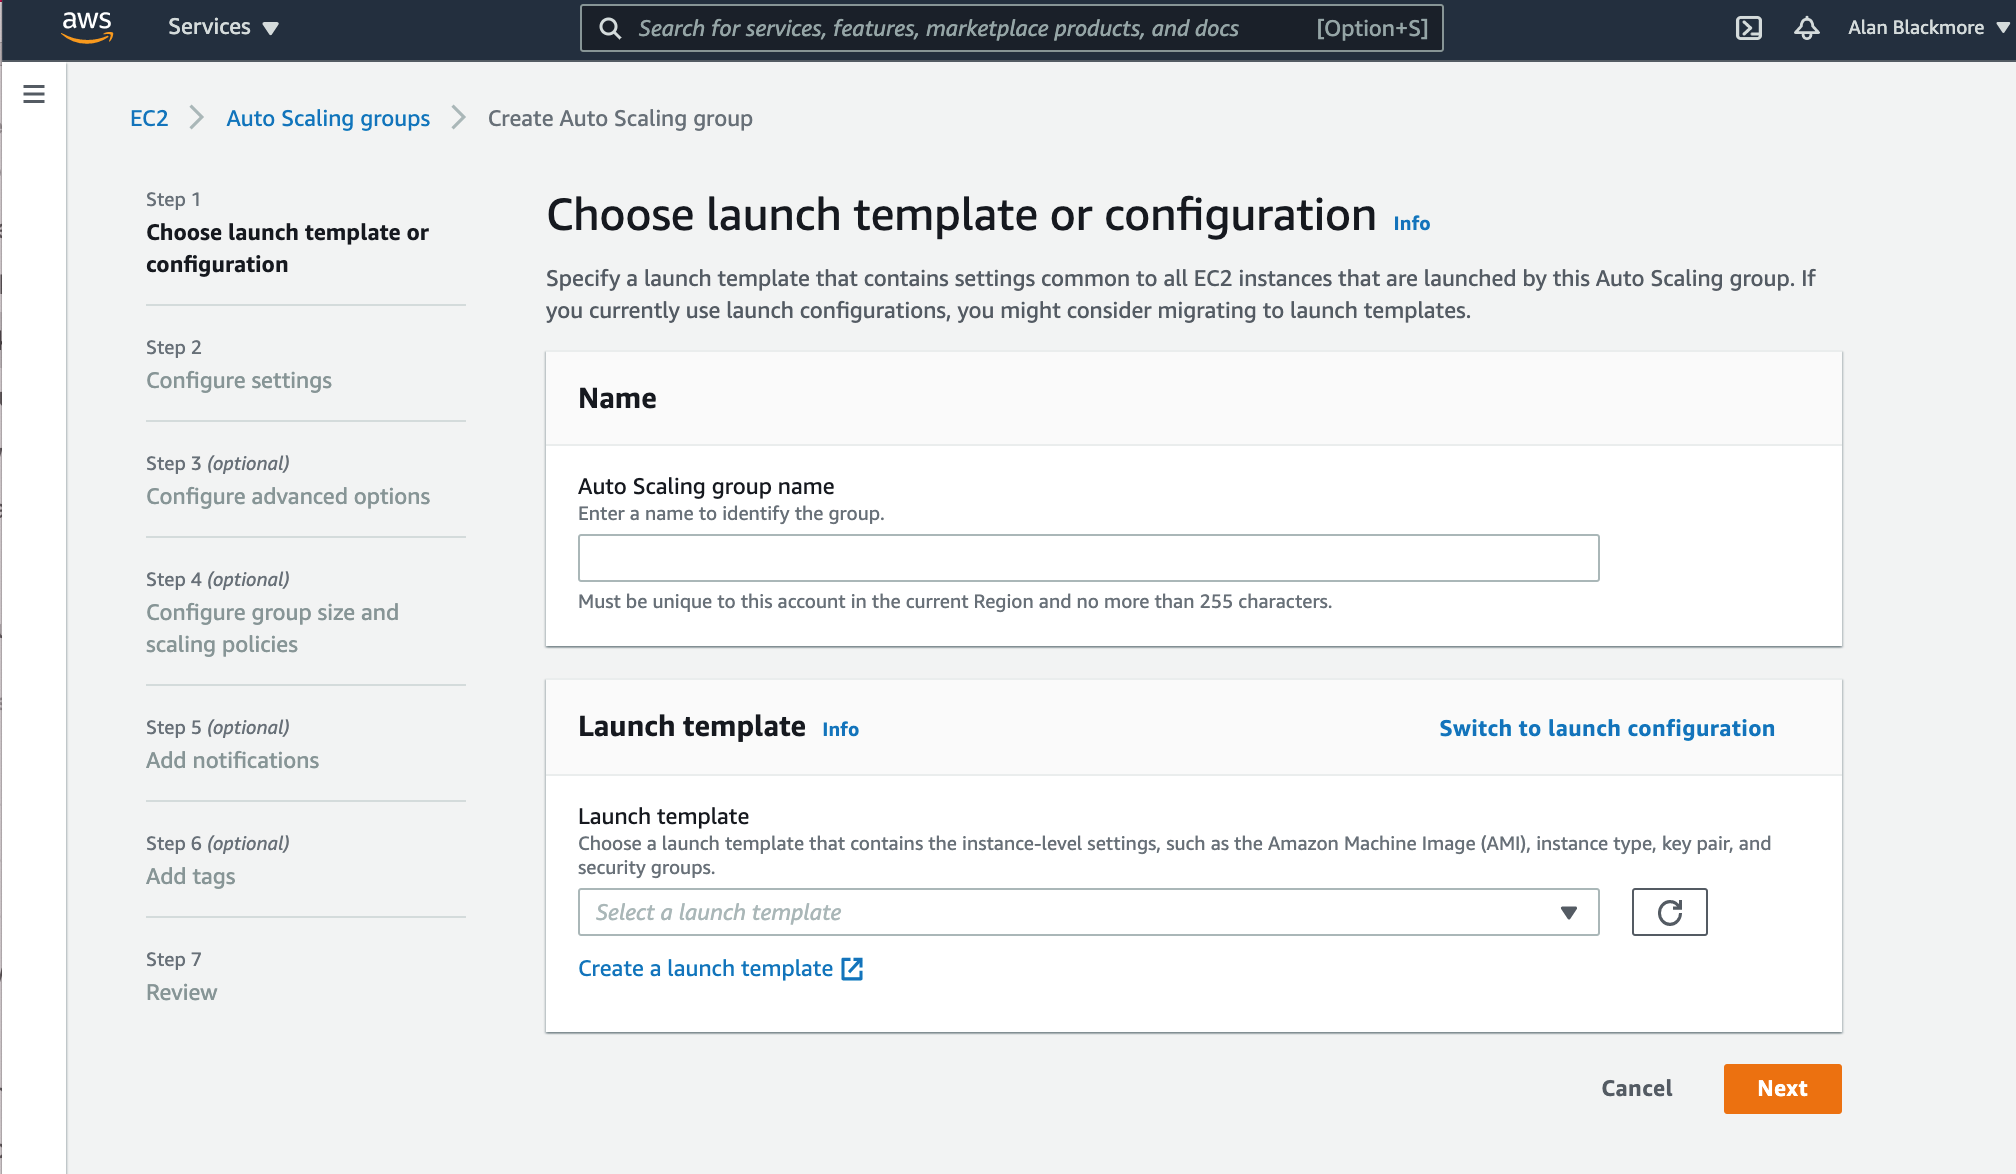
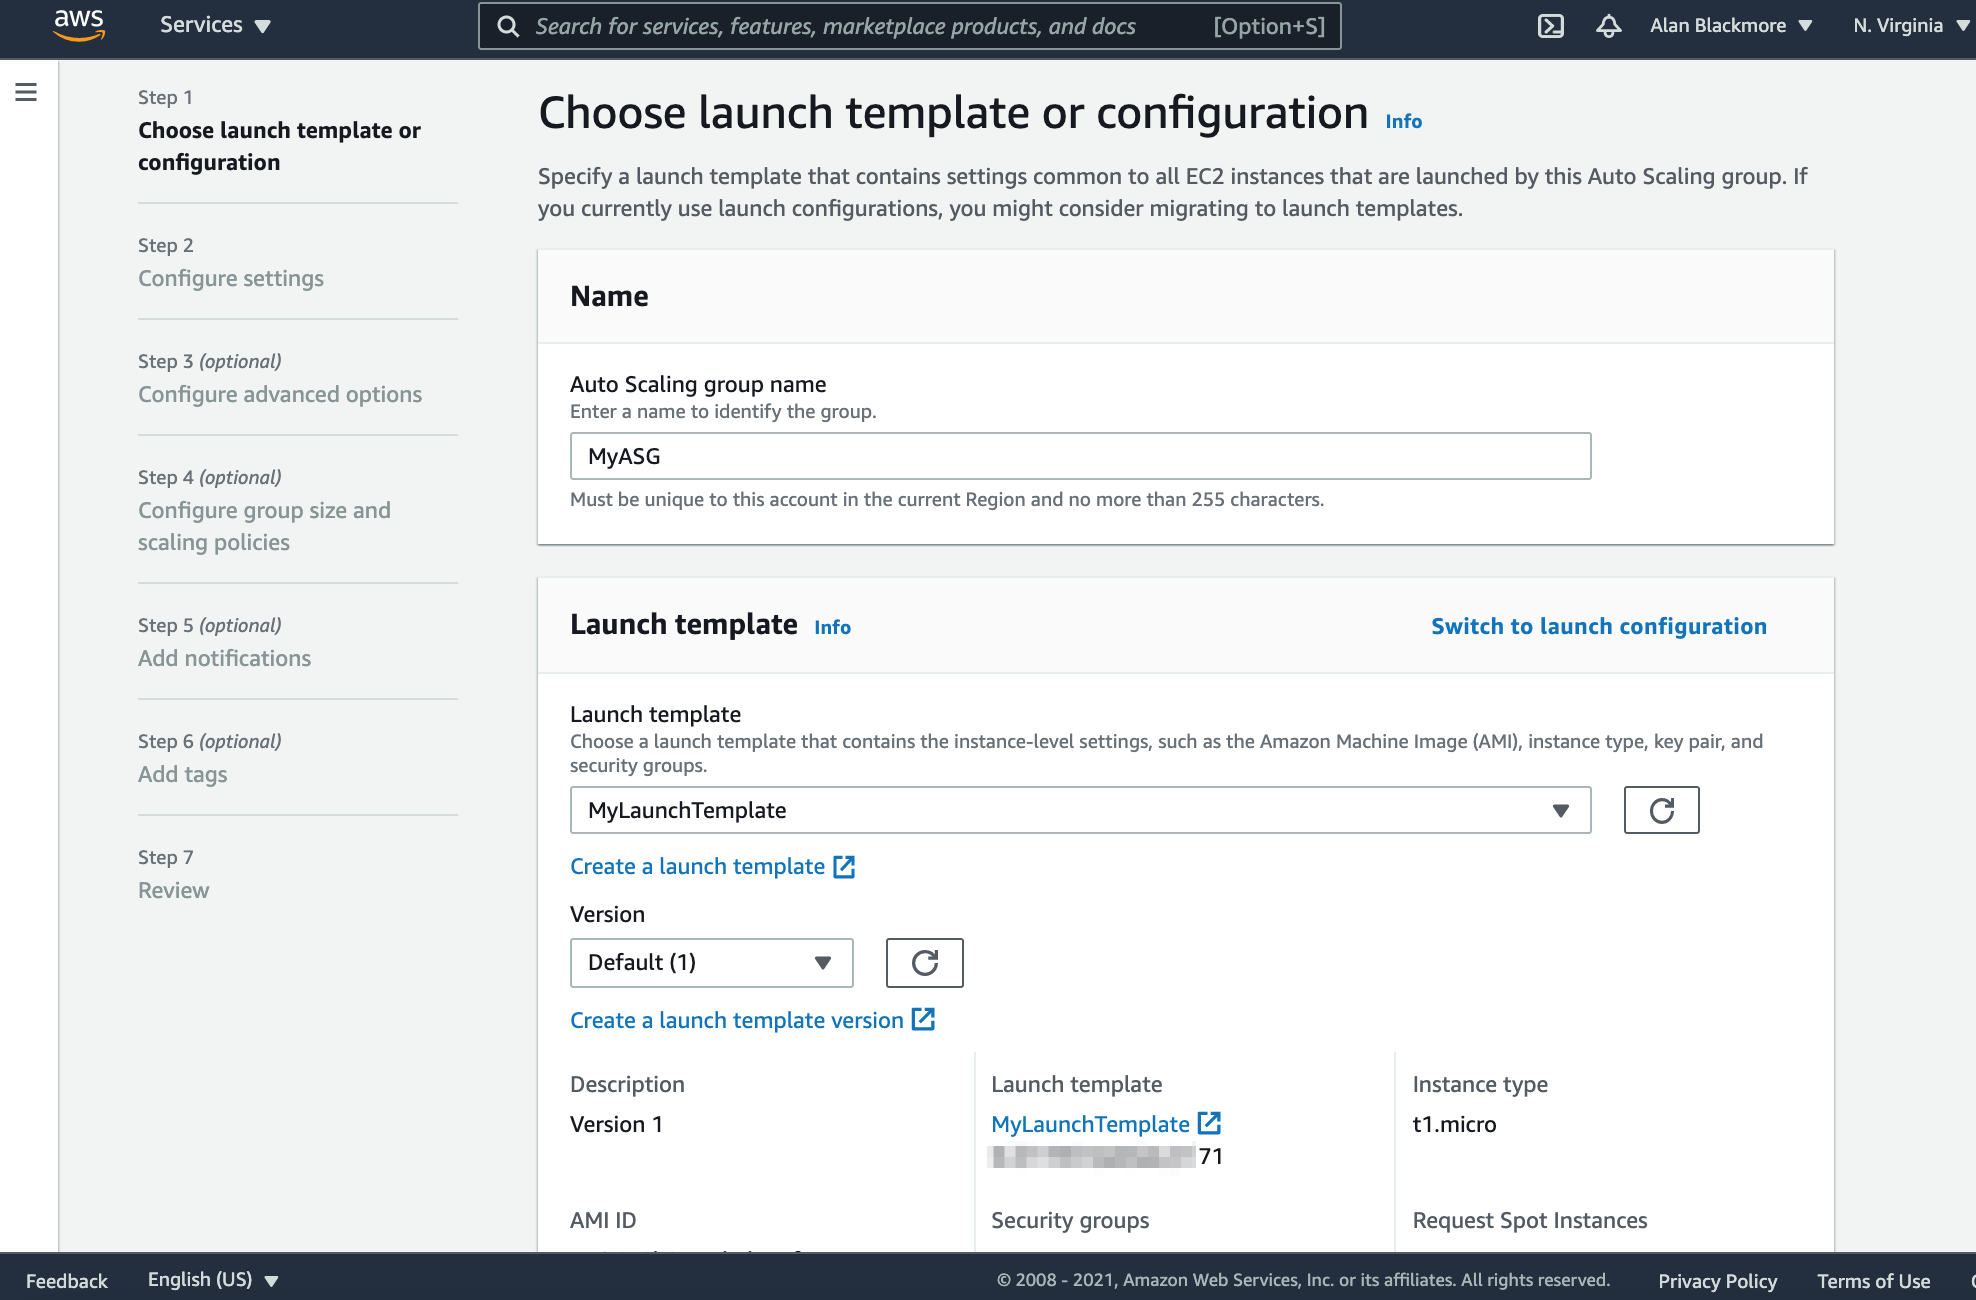
The first step when creating the new ASG is to name the group and optionally select a previously saved launch template or create a new one.
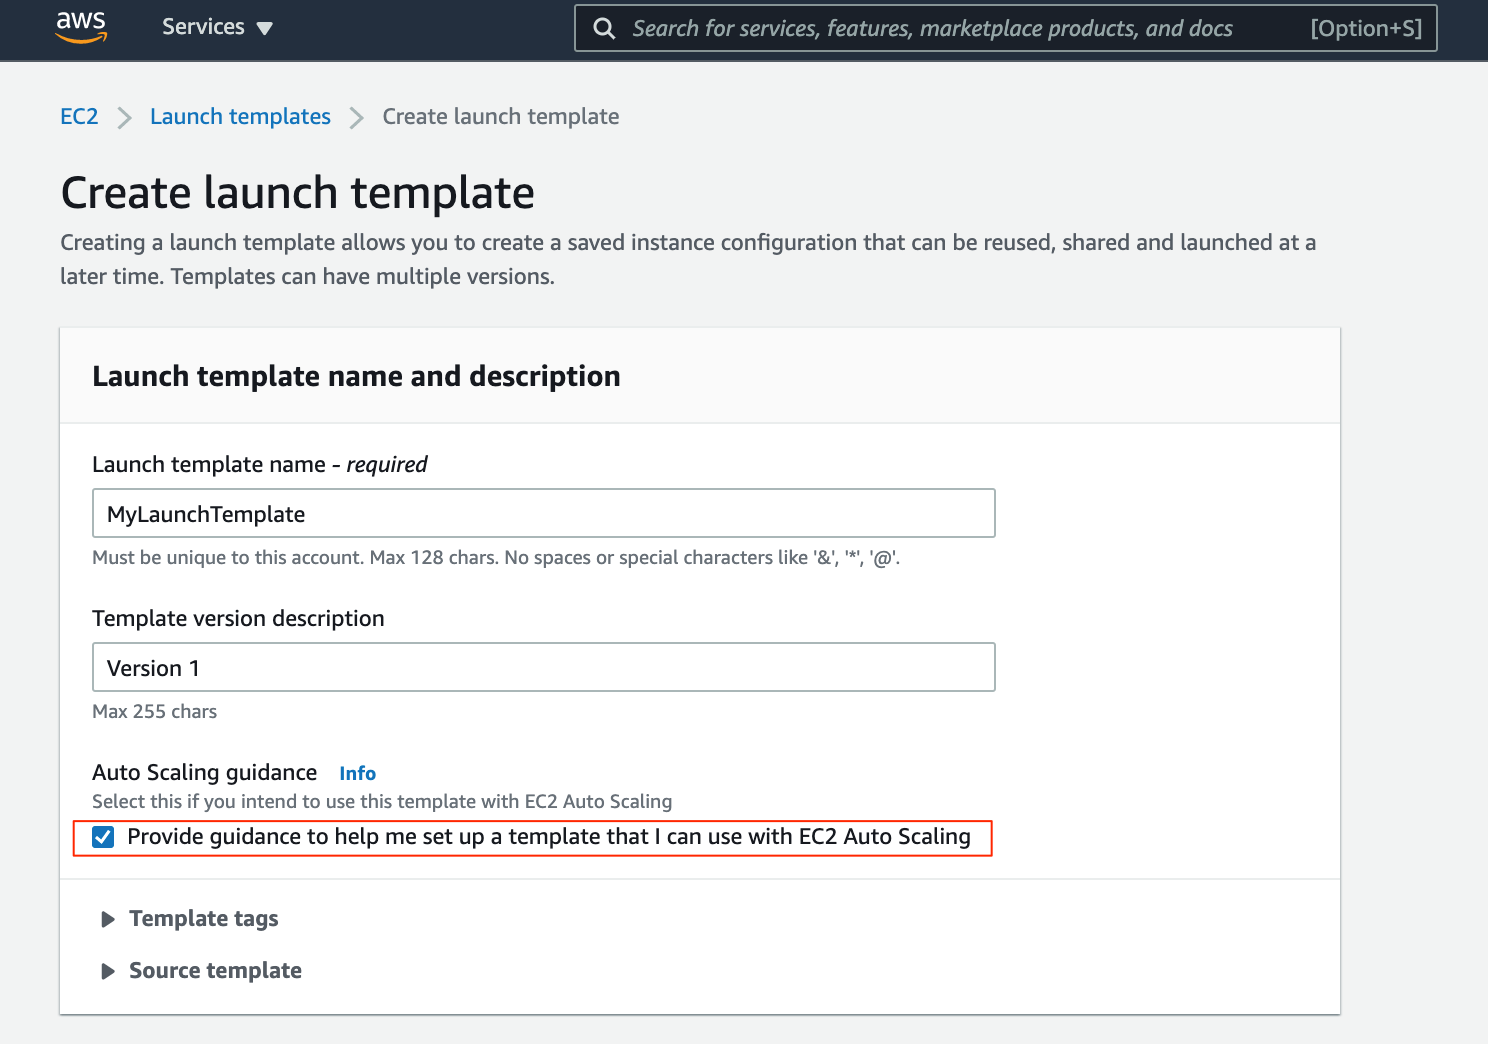
To create a new launch template, enter the new template dialogue. First you will need to name the template and describe the version.
At this point you can check the ‘Auto Scaling Guidance box’ which will change the option boxes to make the necessary settings for auto scaling mandatory.
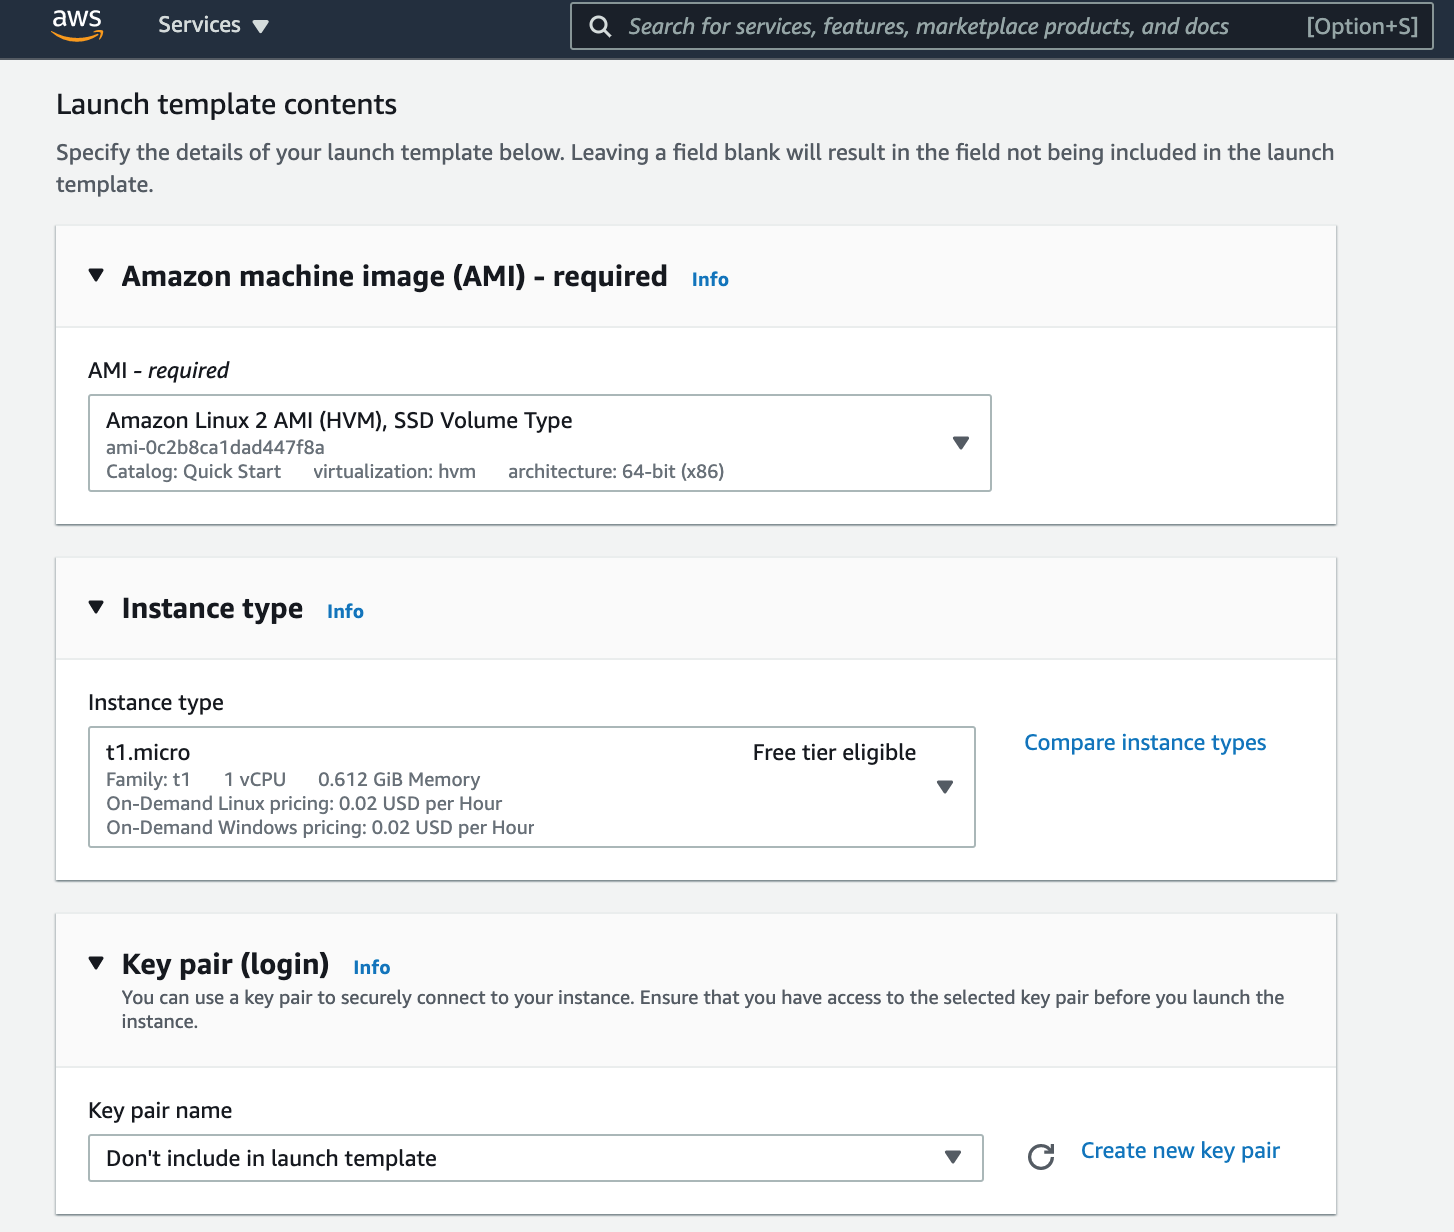
Next you will need to select which Amazon Machine Image to use (AMI) which contains the operating system and architecture to provision. Next choose the instance type to provision when this template is used. This dictates the CPU and RAM allocated to each instance and will dictate overall costs. The autoscaling process does not cost anything to use, you only need to pay for the resources it provisions when scaling out.
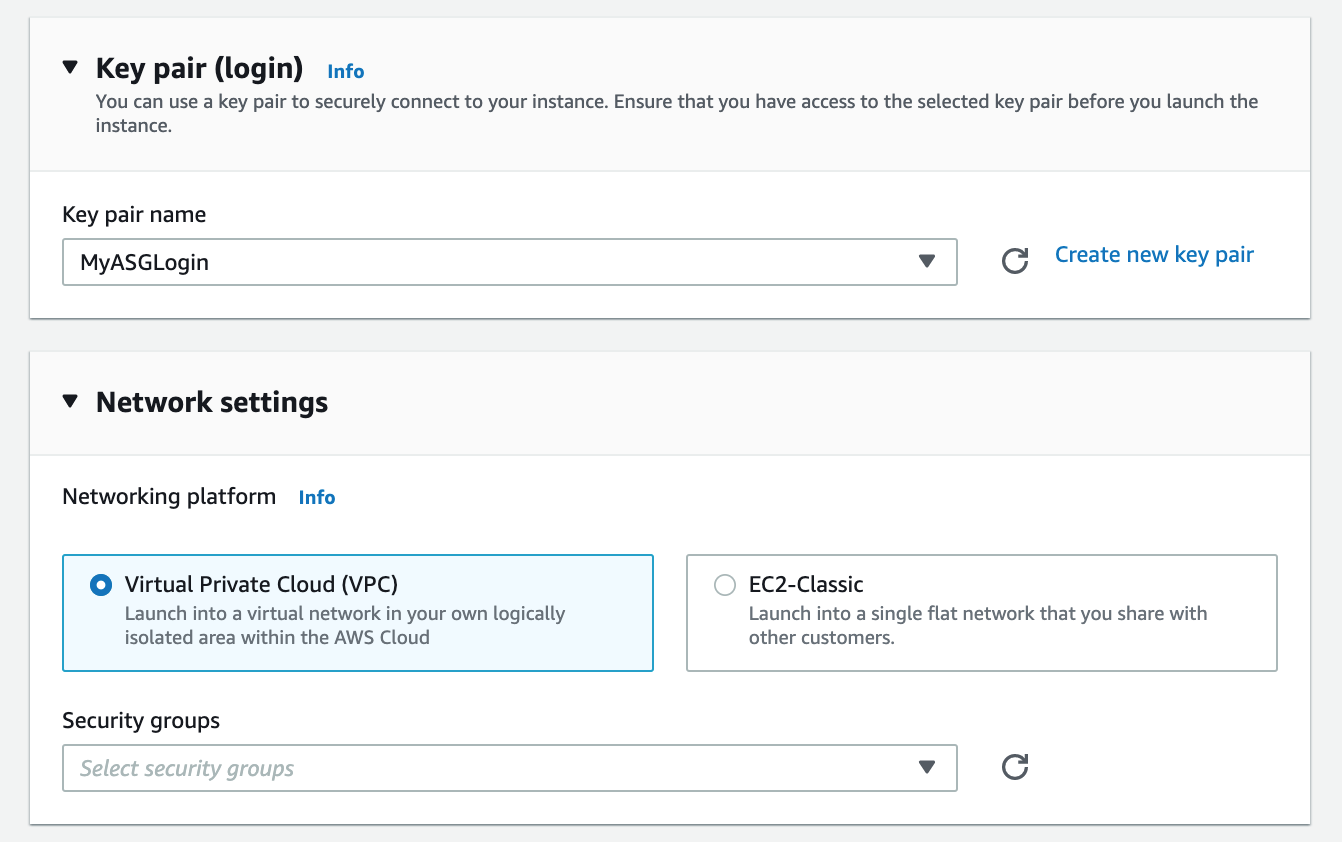
Now you should create or select a key-pair to use to access the instances provisioned within the ASG and nominate whether you wish to create the resources within a VPC or not. You can also nominate a security group at this point.
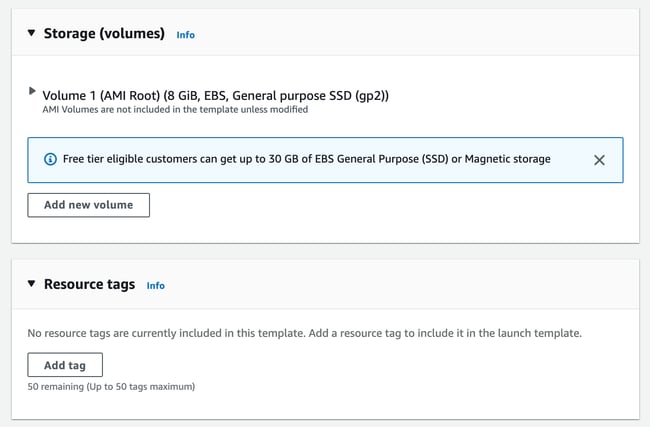
Next you can select storage volumes and resource tags and then create the template.
Now we can use the template to set up the ASG by entering the new ASG name and selecting the template and advancing to the next page.
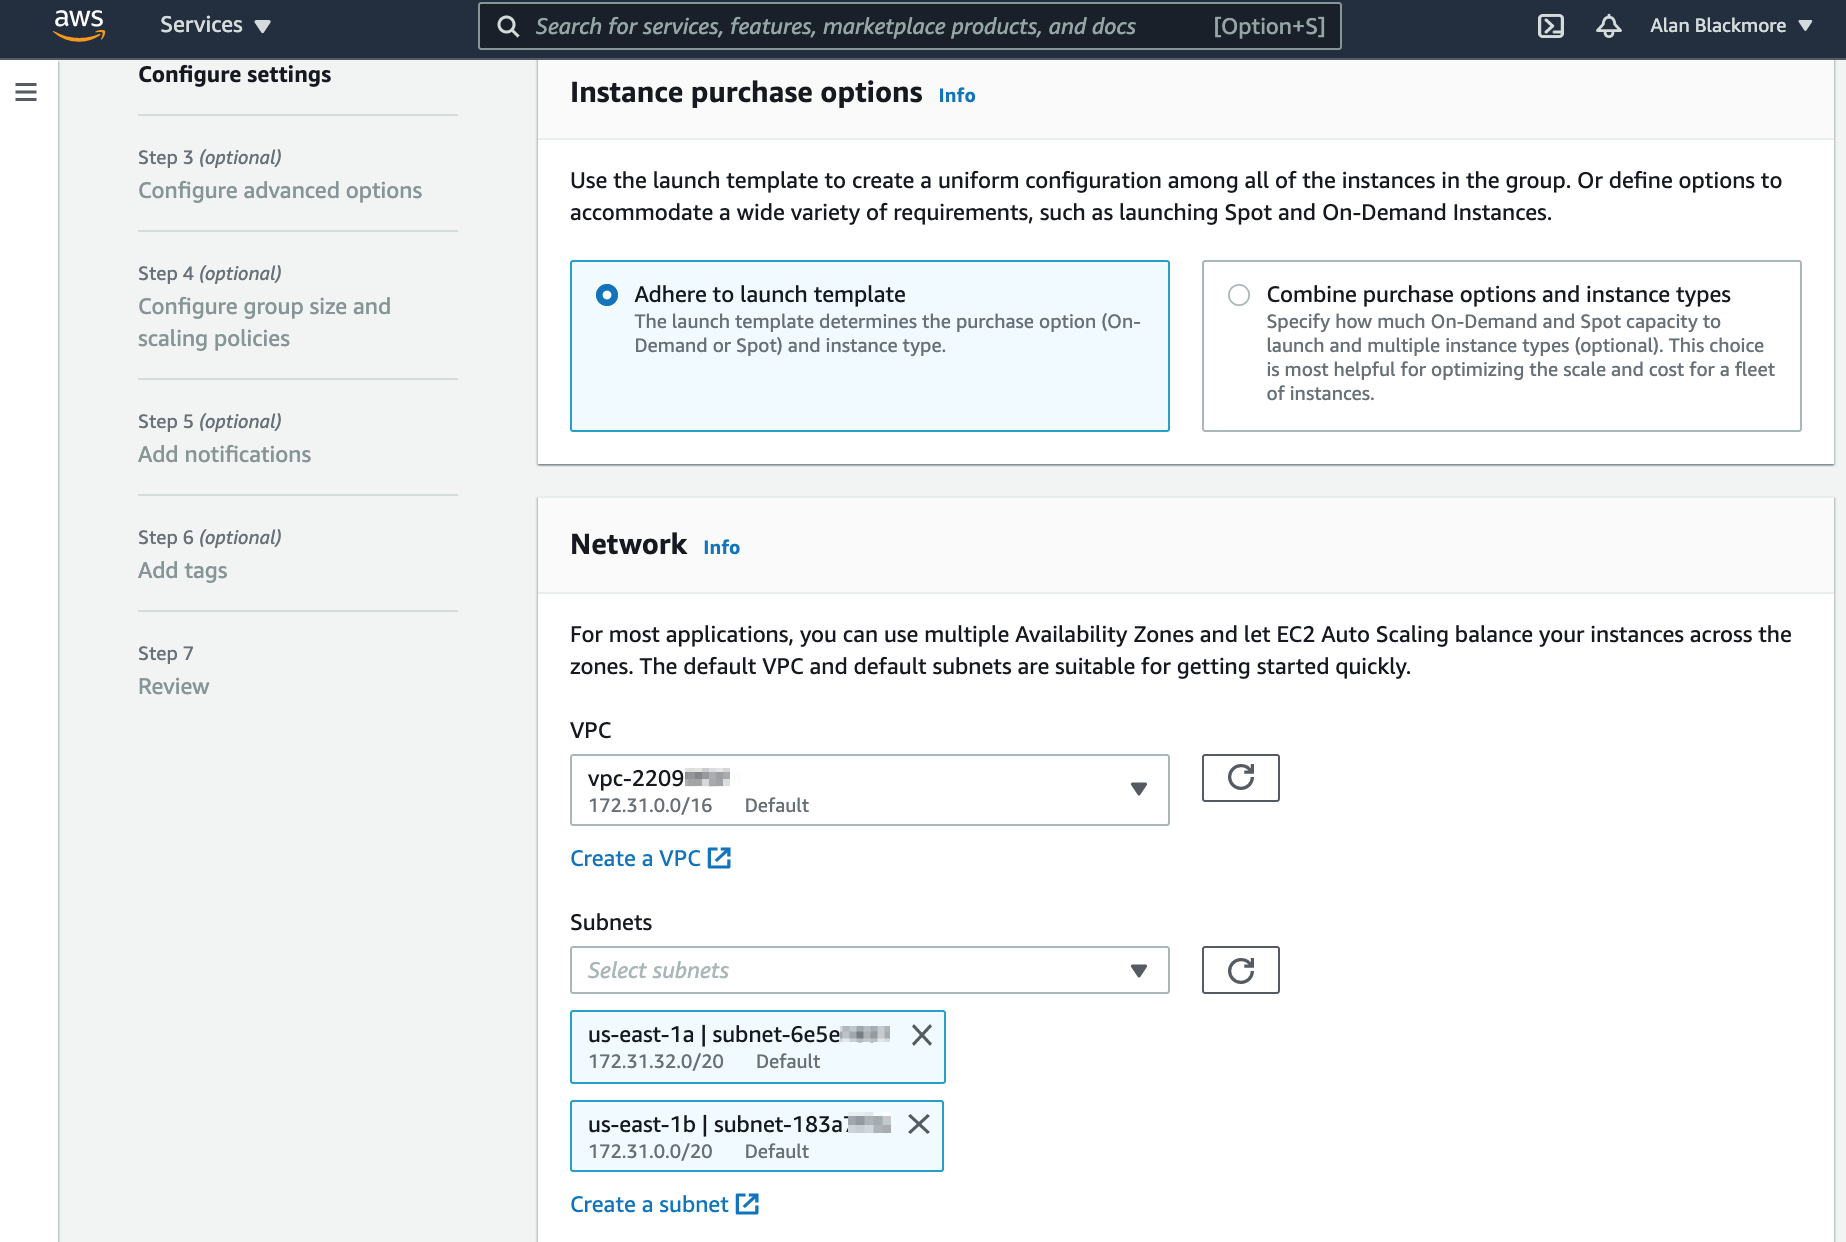
The next step is the “Configure settings” step where you can stick with the launch template config or set up manual preferences for on-demand vs spot price instance types and select the requires VPC and subnets.
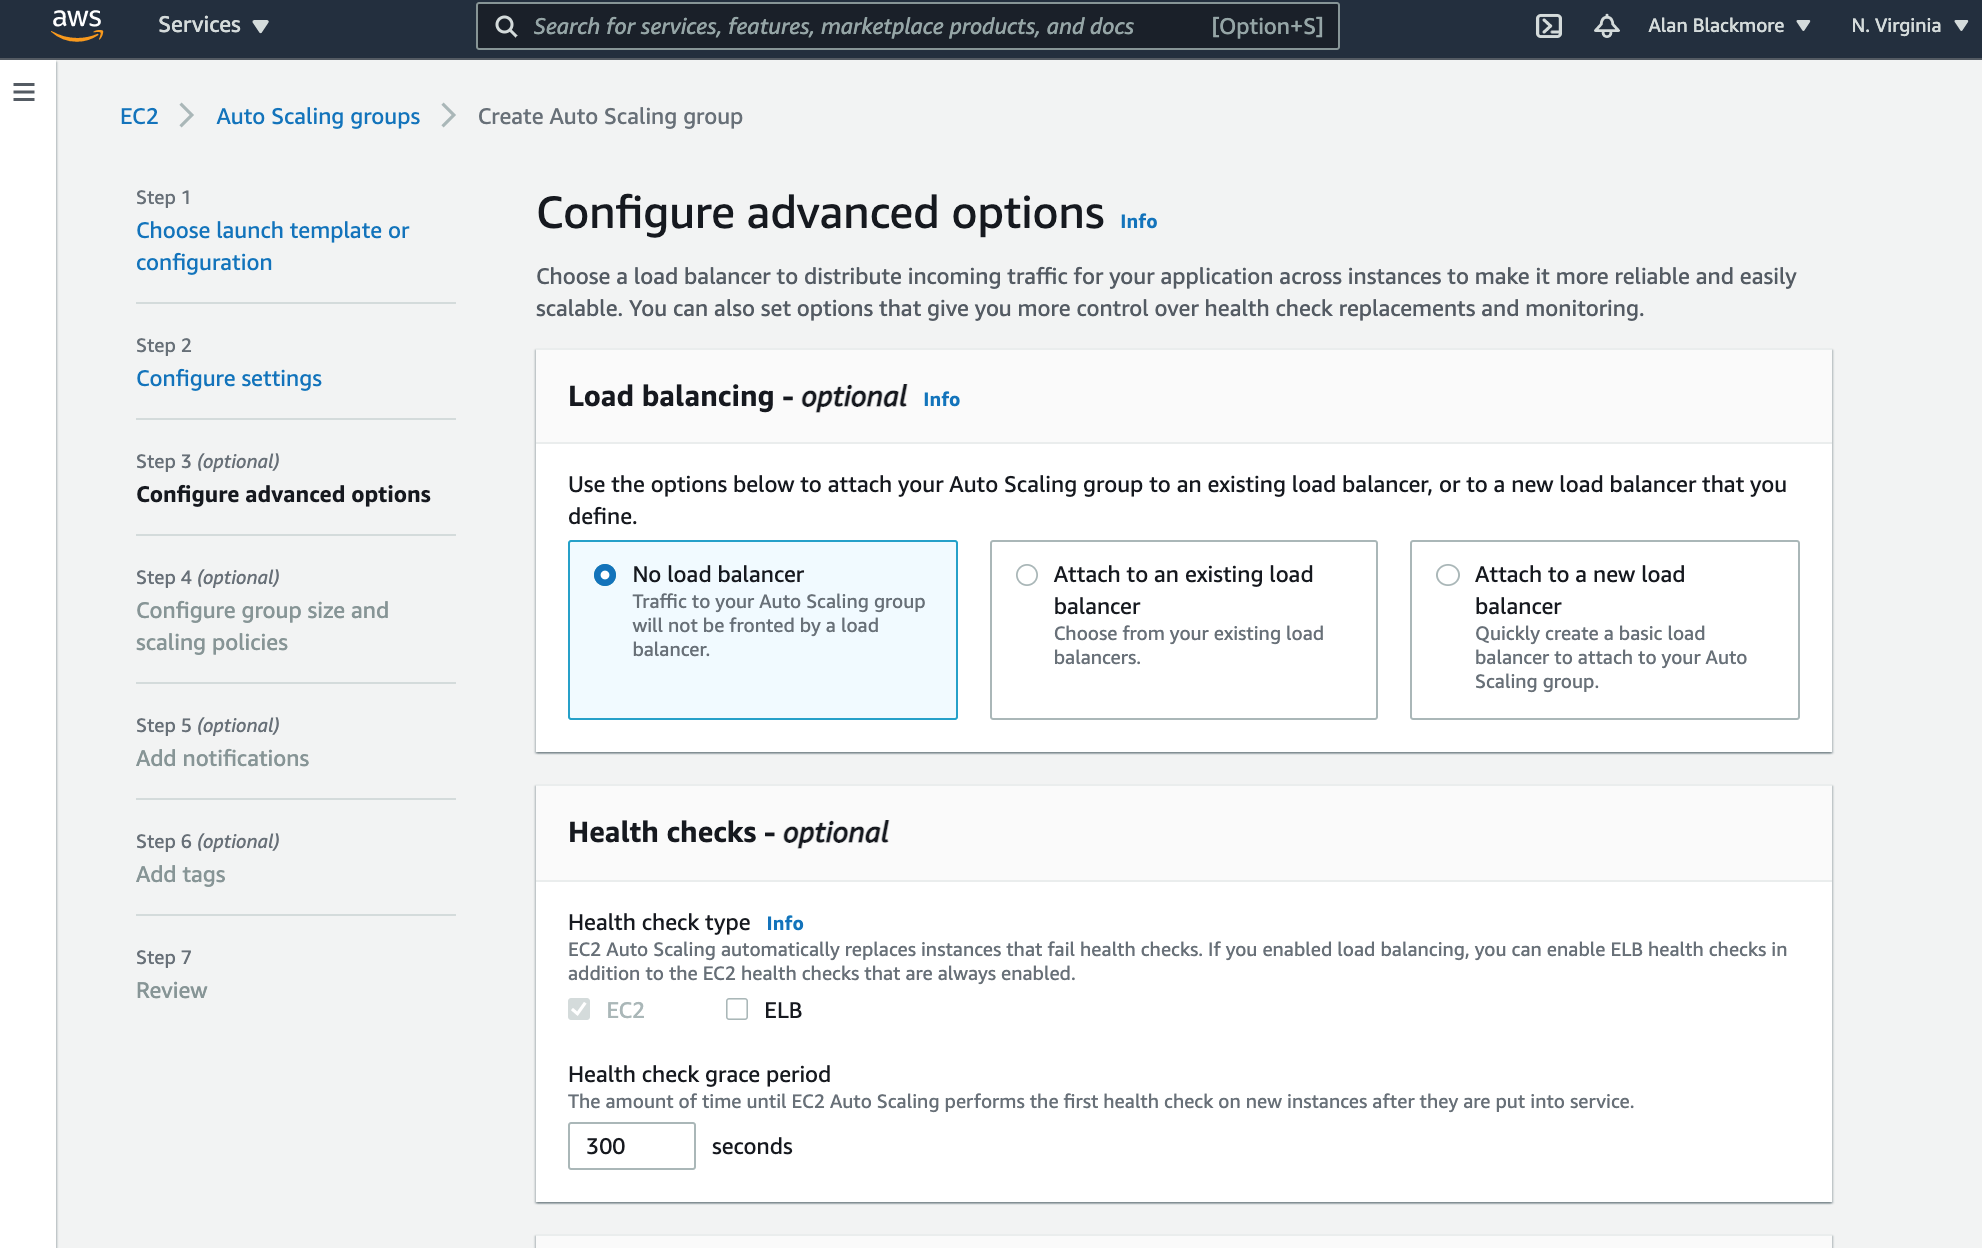
The next step “Advanced Options” allows you to attach or create a load balancer and set up optional health check monitoring
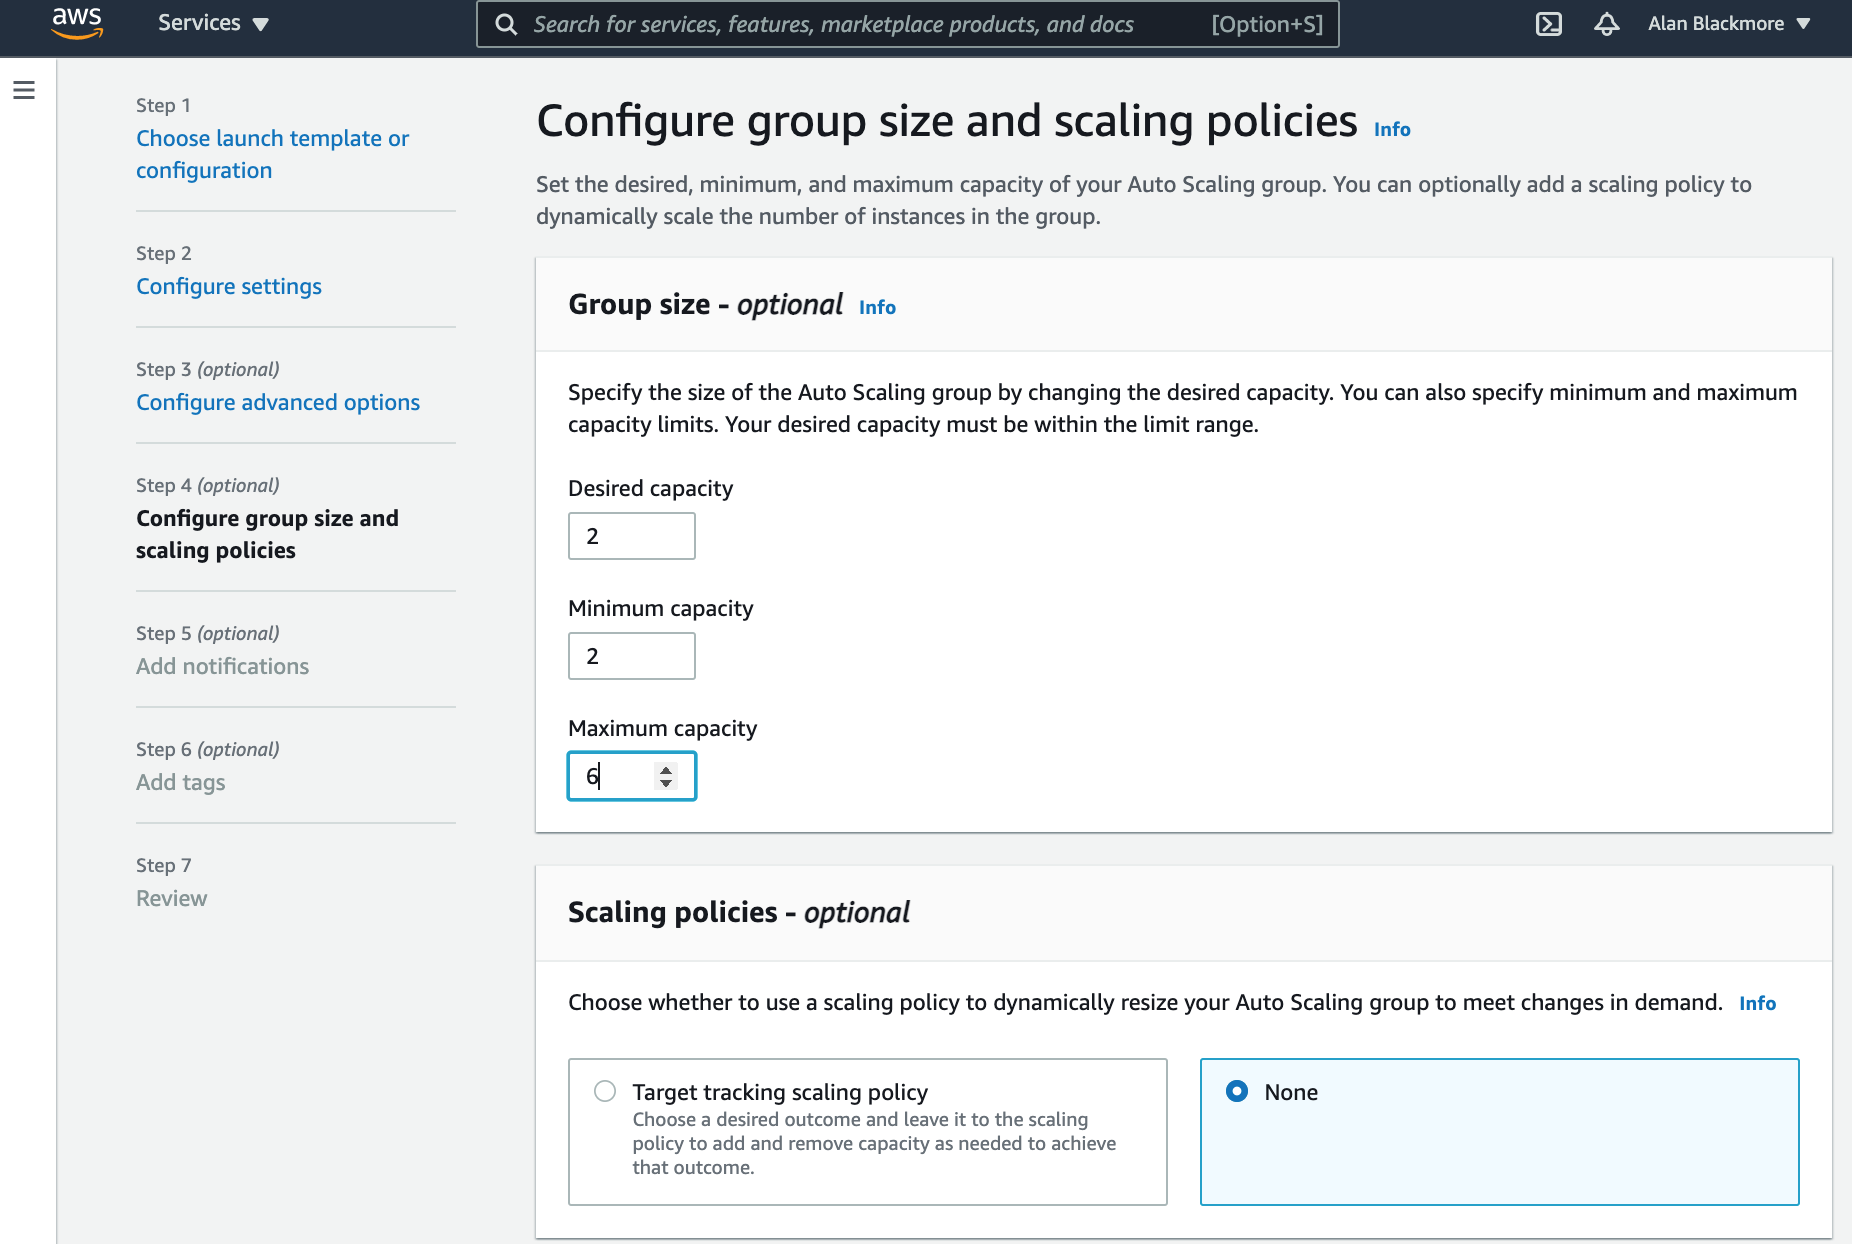
In the next step “Configure group size and scaling policies” is where you can specify the minimum, maximum and desired number of instances in the ASG. Once set up auto scaling will provision your desired number of instances and then respond to loads and scale out and in as required.
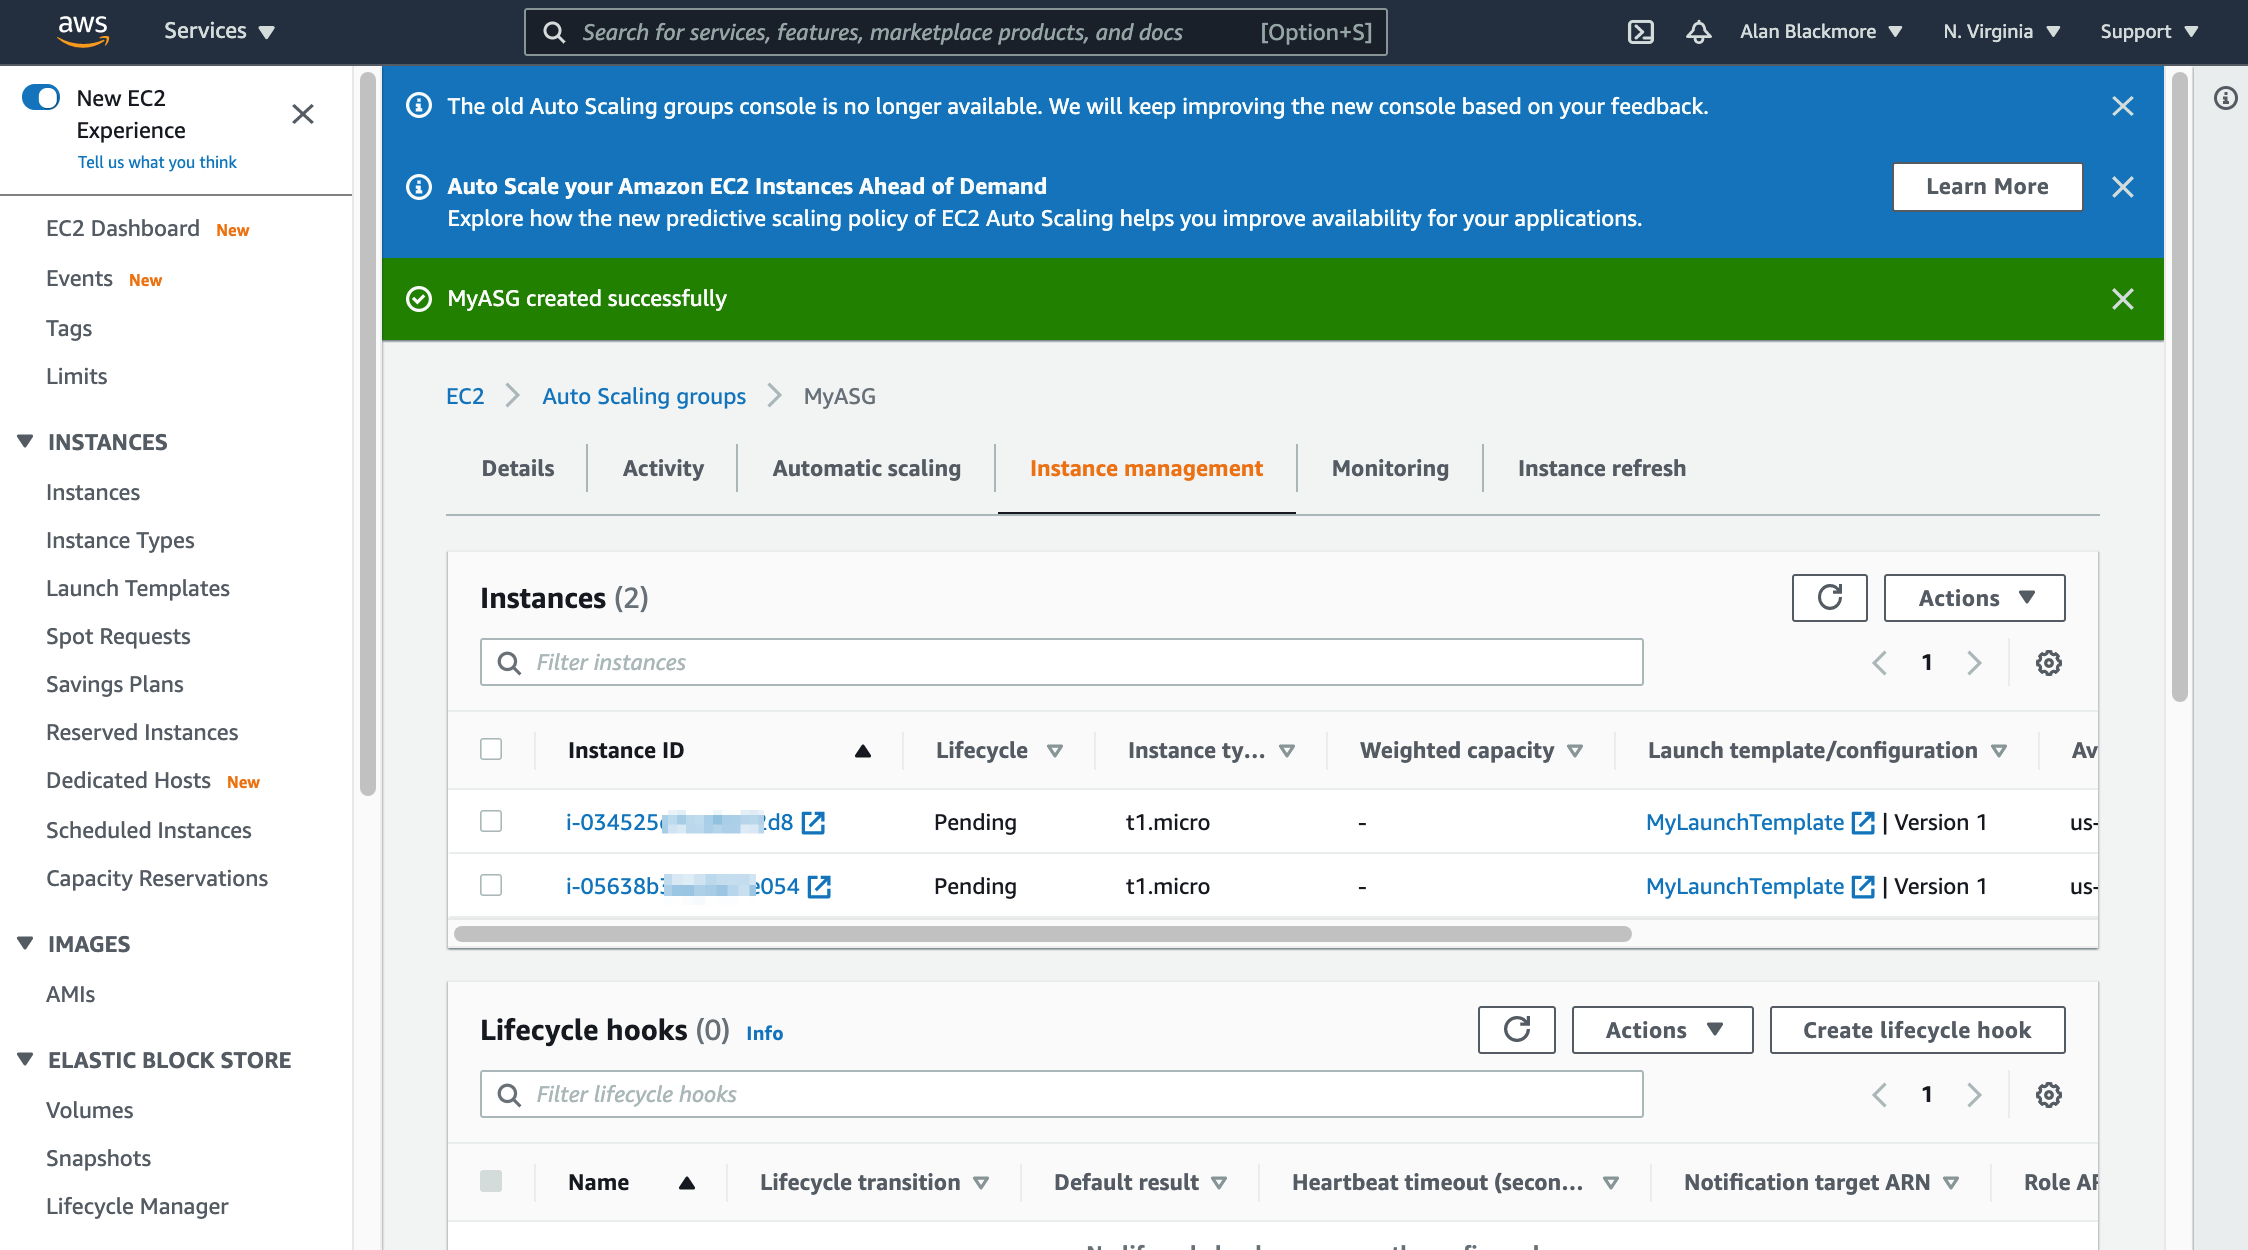
In the following two steps you can SNS notifications and tags. Once you are happy with the details on the review page you can create the ASG
To control the auto scaling policies, you can open the Automatic Scaling tab and create a dynamic scaling policy. You can also disable scale-in in this policy so that the group only ever scales out.
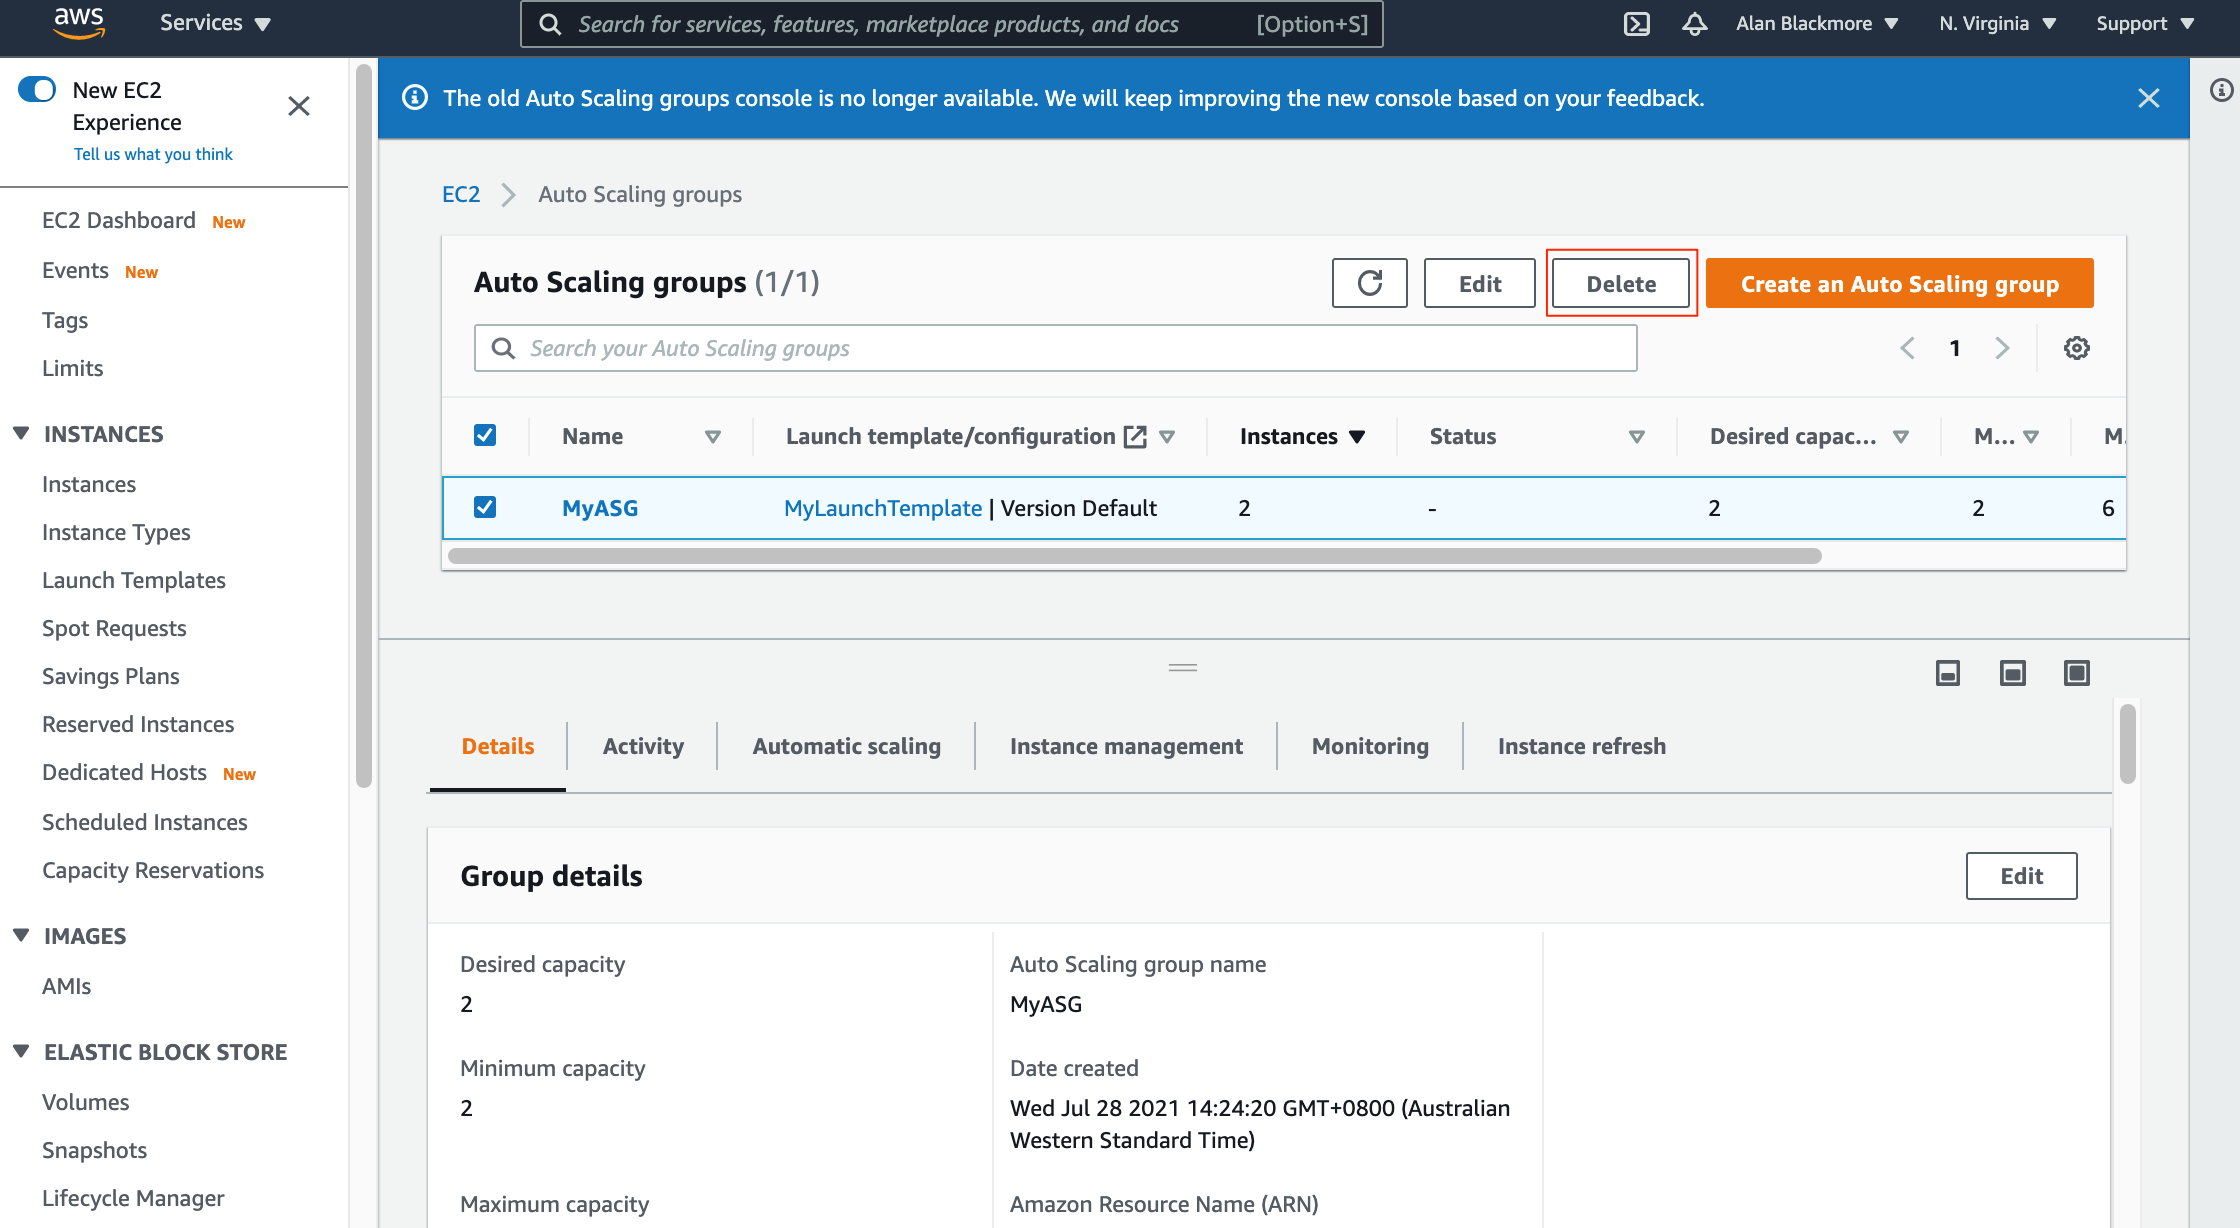
To delete the ASG, you select the ASG from the EC2 Auto scaling groups dashboard and select delete. Deleting the ASG will terminate all the instances in the group.
So that’s a quick run through EC2 autoscaling as a way to automate the provisioning of the correct amount of EC2 instances to provide the right amount of resources to meet your traffic demands while scaling down demand drops to keep control of costs.
Talking of automation (see what we did there) if you are not automating your cloud network topology diagrams we'd like to invite you to check out hava.io. Hava auto generates interactive cloud diagrams for AWS, GCP and Azure by connecting to your cloud accounts. Once the accurate diagrams are generated, Hava keeps them up to date by continuously polling your cloud configuration and updating the diagrams when changes are detected. Superseded diagrams are placed in a version history and can be accessed any time for comparison or analysis.
You can try out Hava today for free. Learn more here:
See also: What is AWS Security Token Service