AWS CLI Command Reference Guide L - Z
Use this AWS CLI Command Reference Guide to view all the available commands in the AWS Command Line Interface from L - Z. Each command details the...

The AWS Command Line Interface (CLI) is a downloadable tool that you can use to manage your AWS services.
The CLI can be downloaded and when installed is integrated into your Windows, MacOS or Linux terminal.
A new “aws” command is then available to execute instructions to AWS to perform the functions you can from the AWS console, like provisioning EC2 instances, moving files into S3 buckets etc.
The advantage the CLI has over navigating through the AWS console, is that you can place your CLI commands into scripts, so that lots of repetitive tasks that you may need to perform frequently, like stopping all your EC2 instance at the end of the day can be automated.
To install the AWS CLI you can go to https://aws.amazon.com/cli/
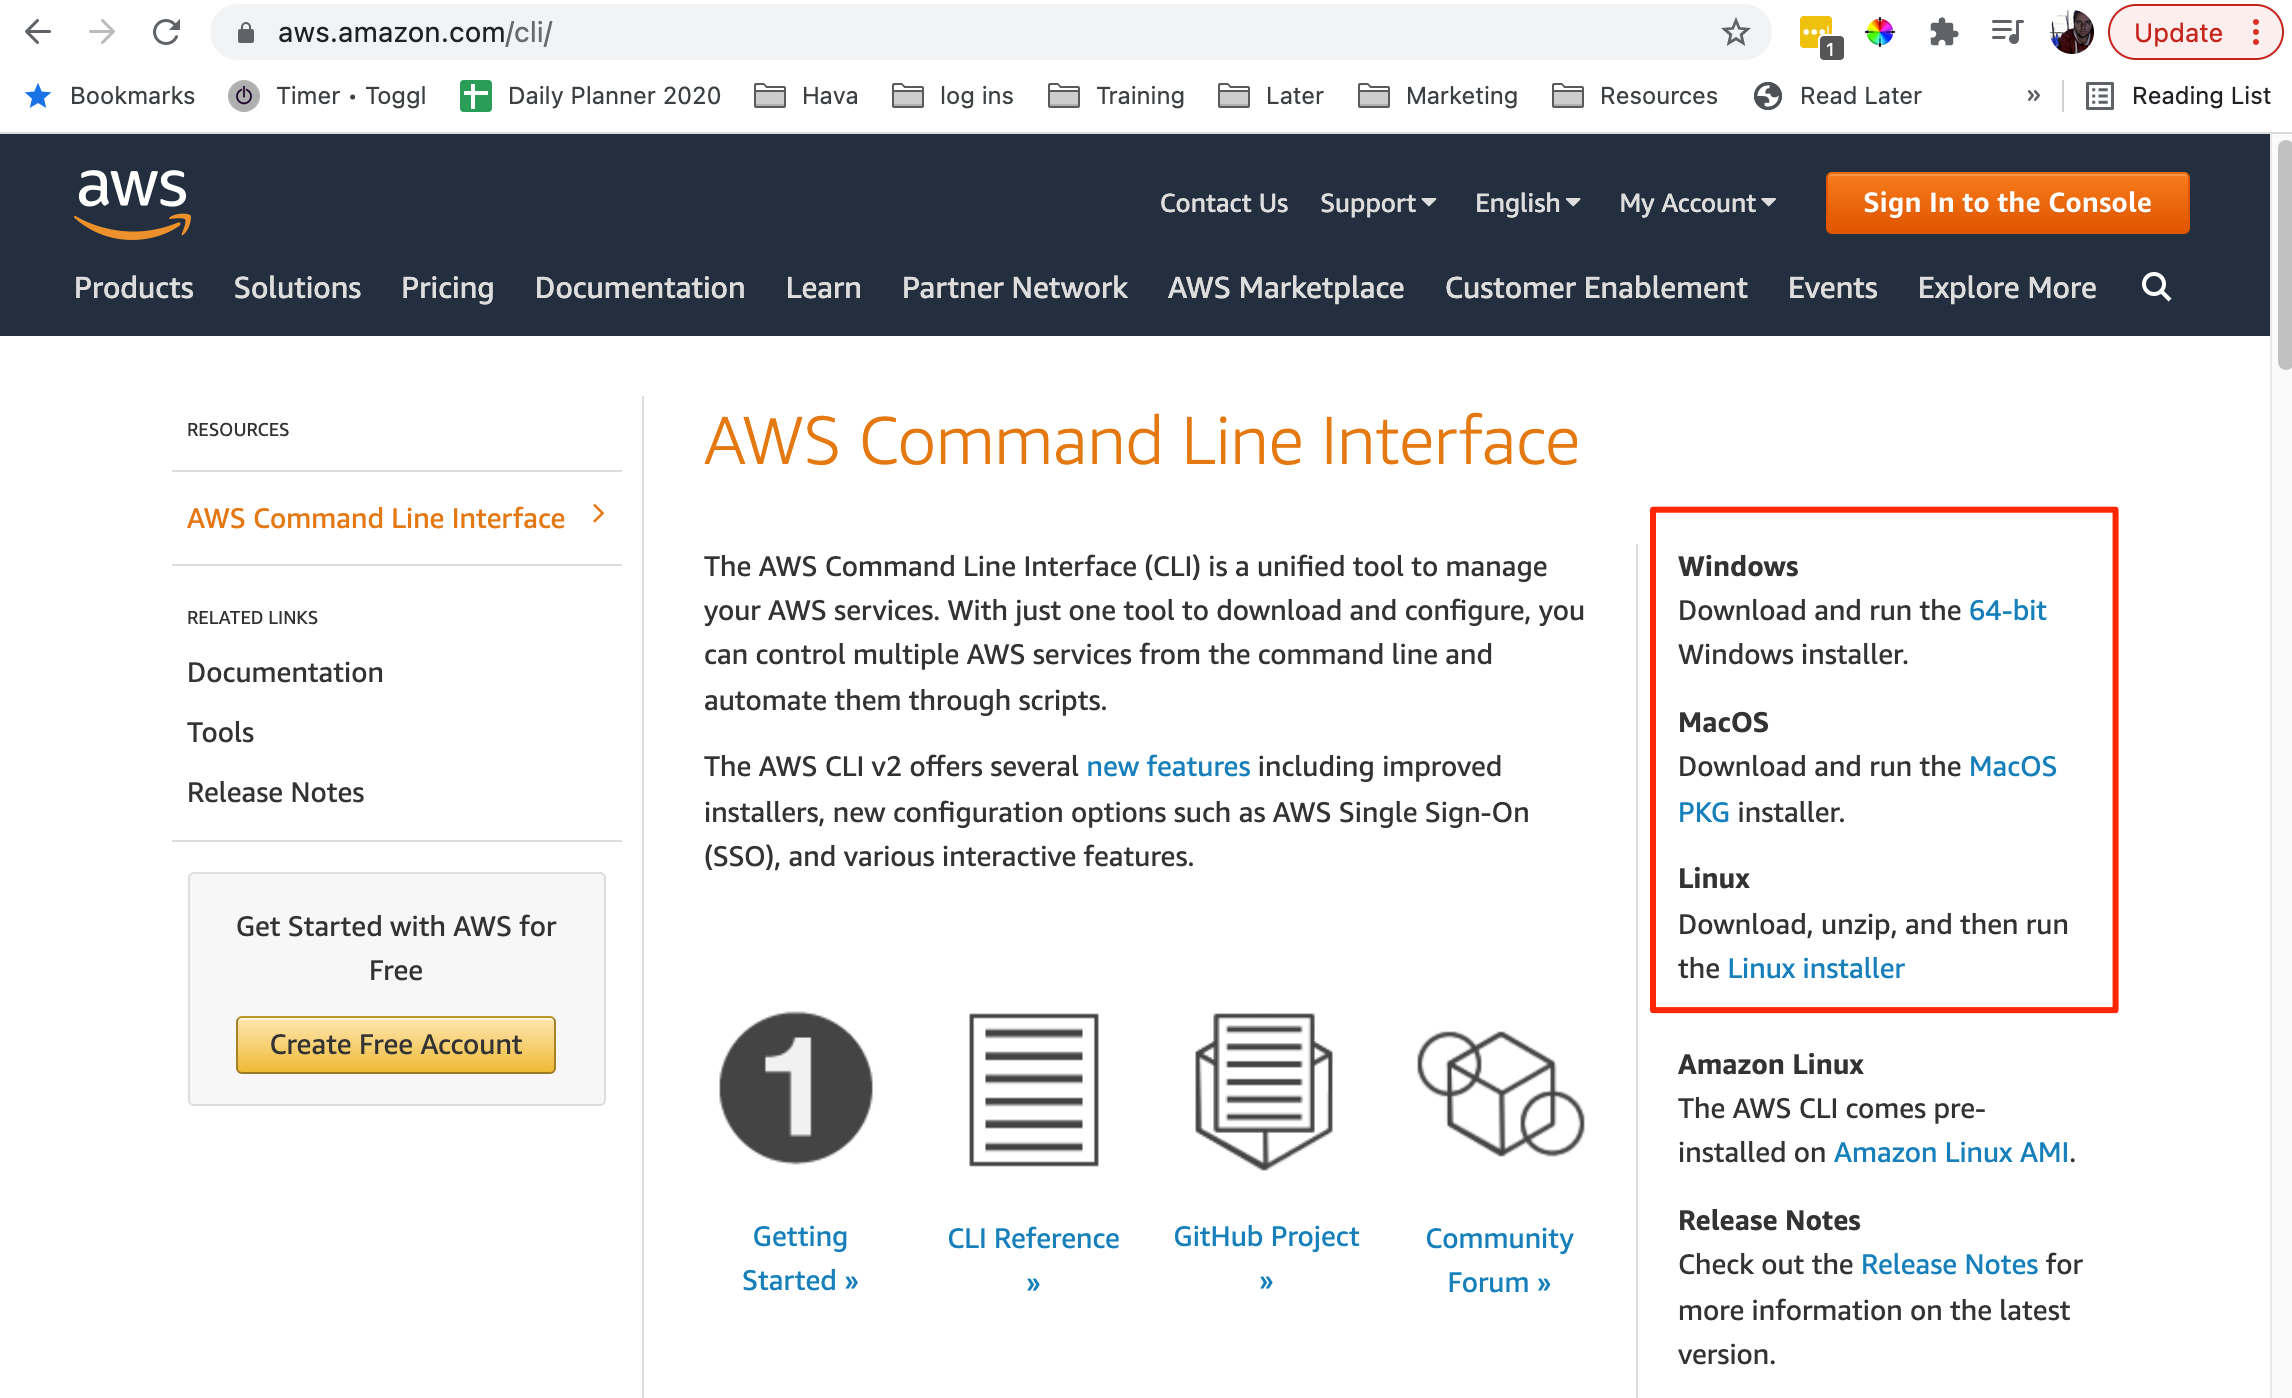
On the right hand side of the screen you will find the download instructions for Windows, MacOS or Linux. If you are using Amazon Linux, the AWS CLI comes pre-installed.
Selecting the MacOS option downloads the latest PKG installer package. At the time of writing, this is called AWSCLIV2.pkg
Double click the PKG file to execute the installation:
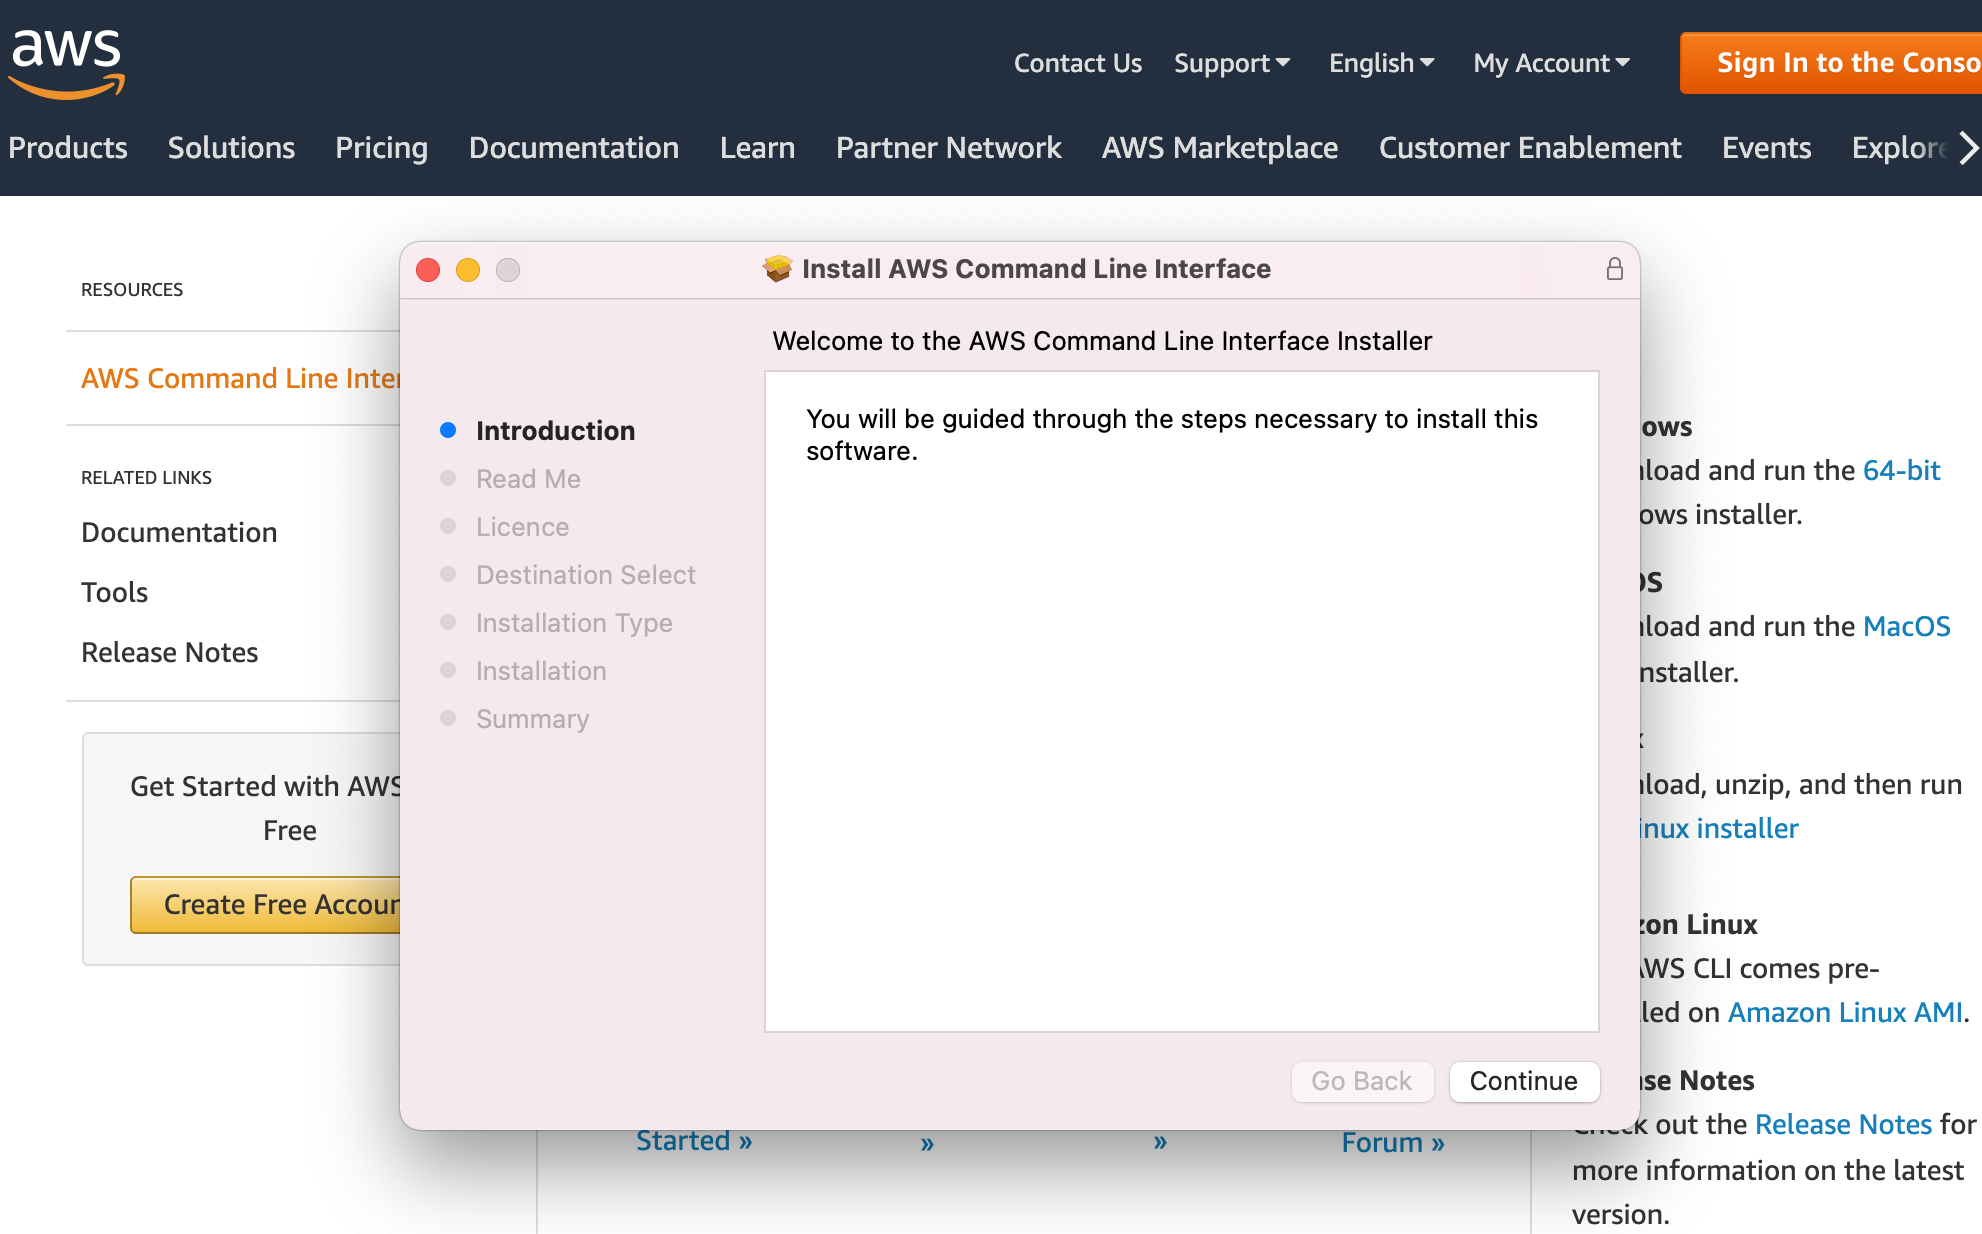
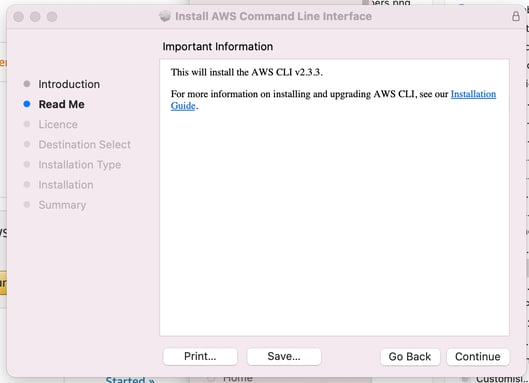
This will step through the installation Readme, Licence Details:
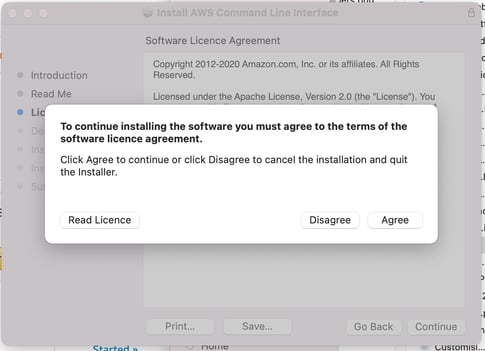
You will be provided with the chance to read the licence
The next step is to review the installation type. If you already have an older version of the CLI installed, the installer will detect it and indicate the installation will be an upgrade:
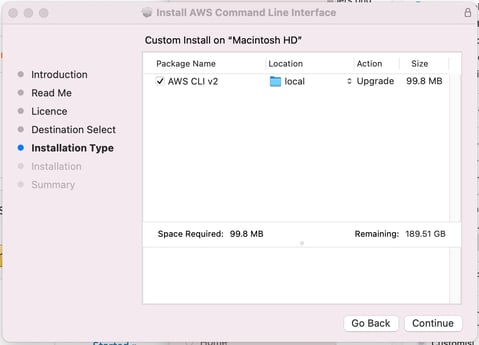
From there you select “install” and the AWS CLI will be installed.
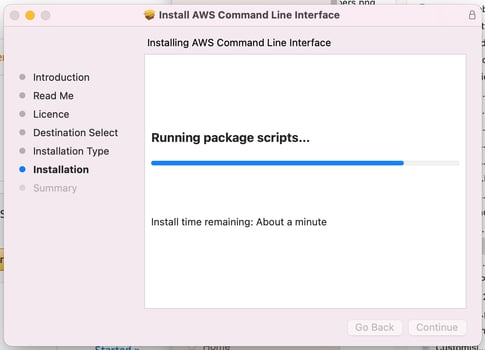
To verify your installation has been successfully installed, you can open a terminal window and enter an aws help command like:
aws help --version
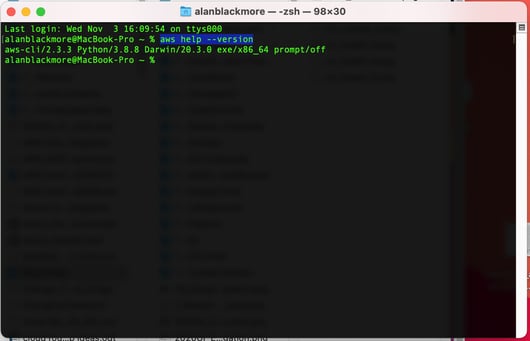
Now you have the CLI installed, before you can use it with your AWS account, you will need to use the aws configure command to associate an AWS account with your CLI.
To do this create or open an IAM user account and copy the Access Key ID and the AWS Secret Access Key for the user.
In this instance, I will create a new IAM user called “MyCLI”
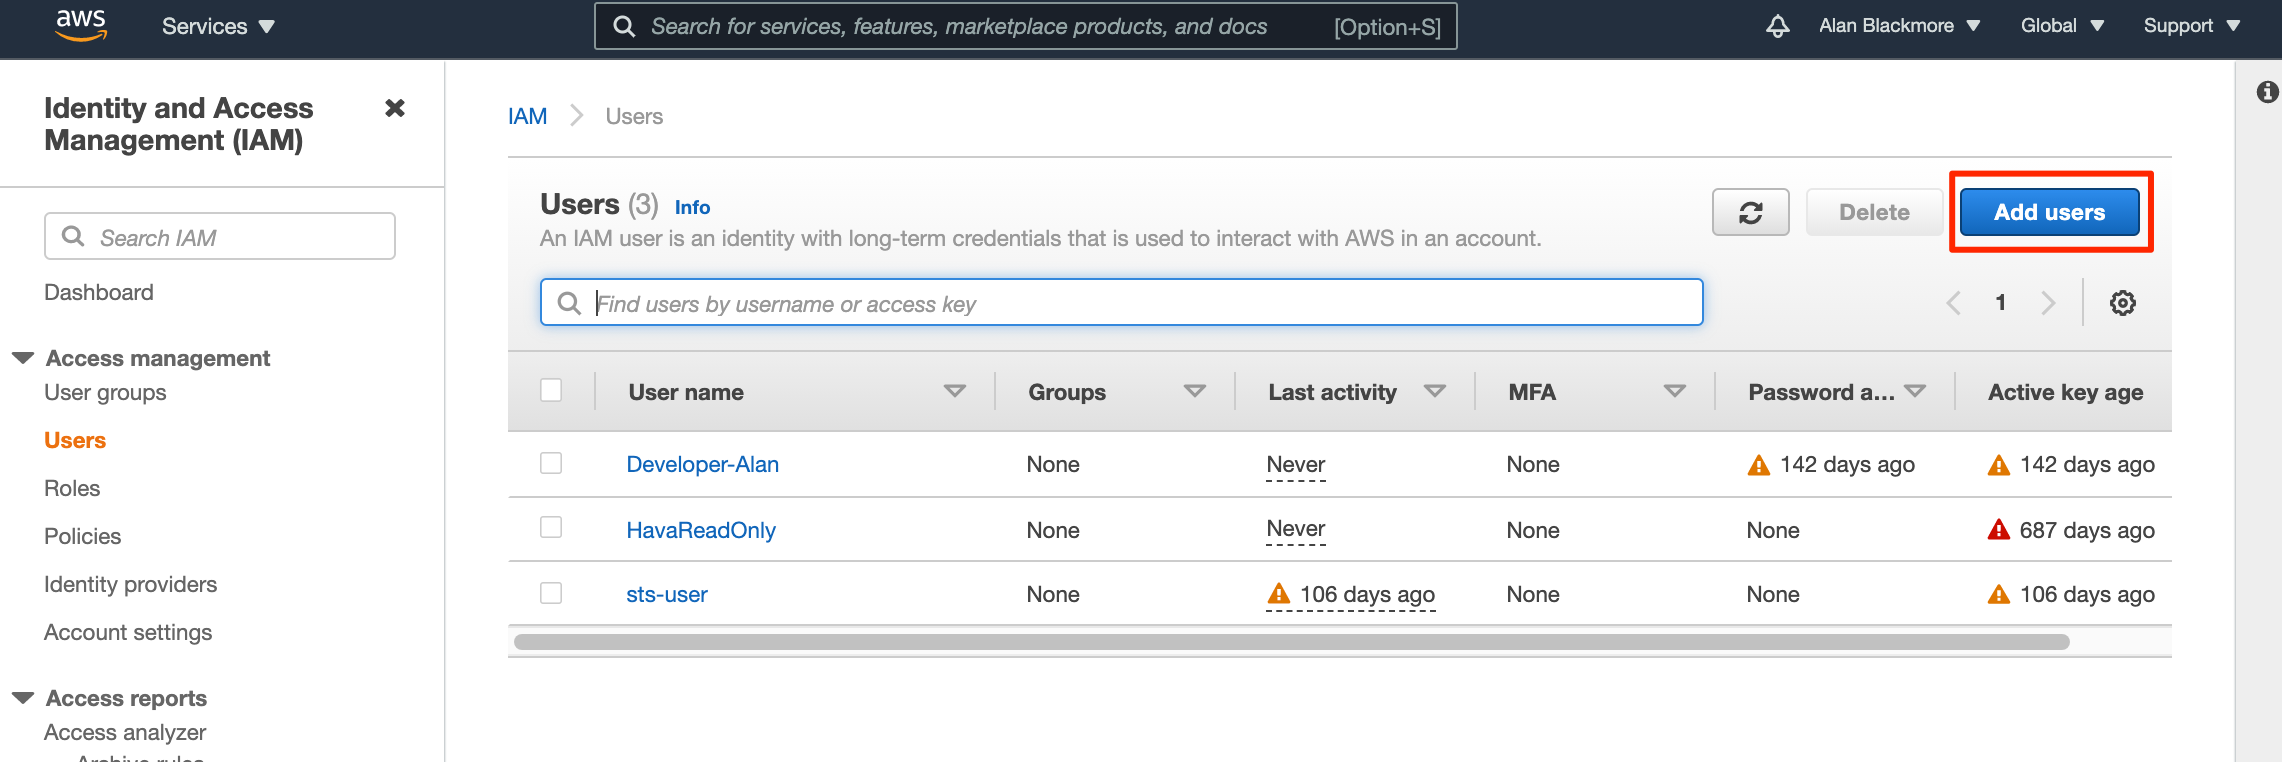
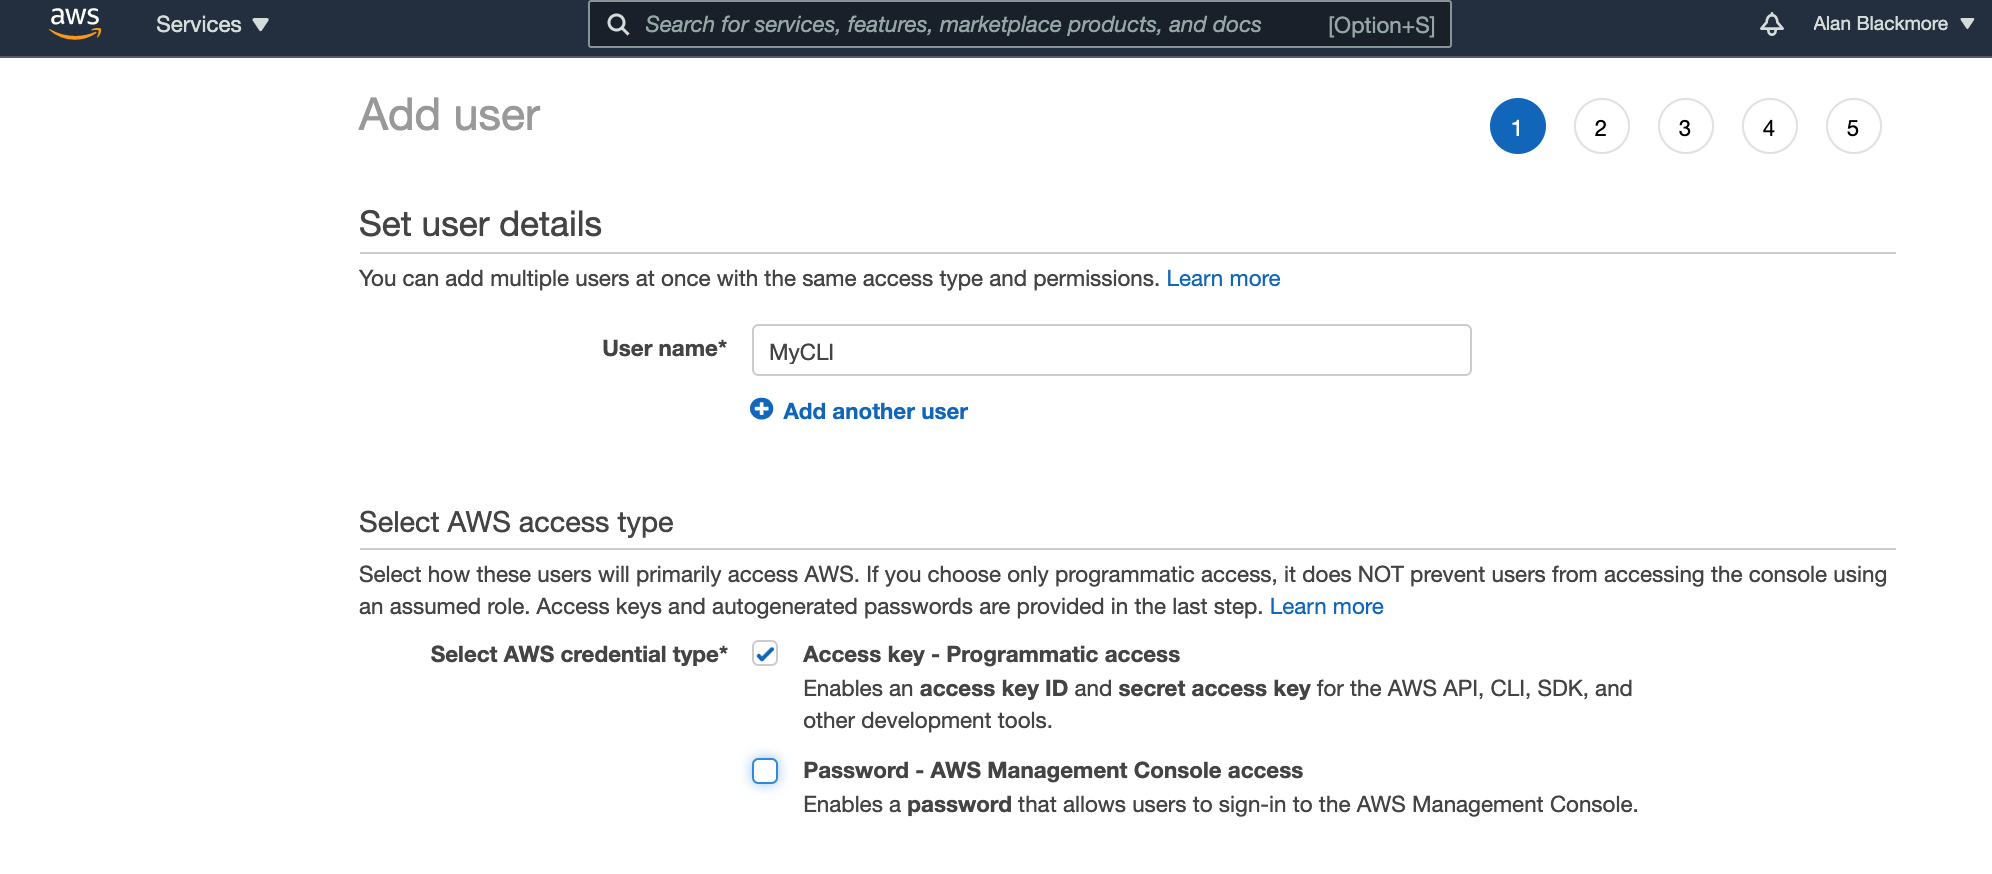
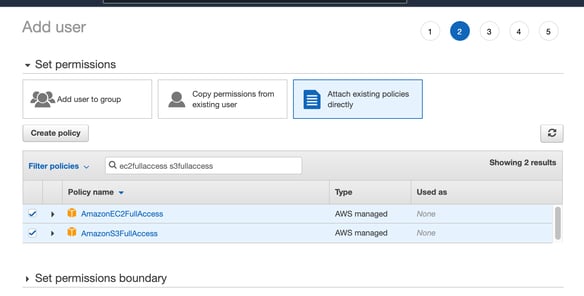
Then you can give the new user the same permissions as an existing user, add the new user to an existing user group, or select and attach some existing permission policies to the user - in this case we’ll select a few existing policies like EC2 and S3 permissions.
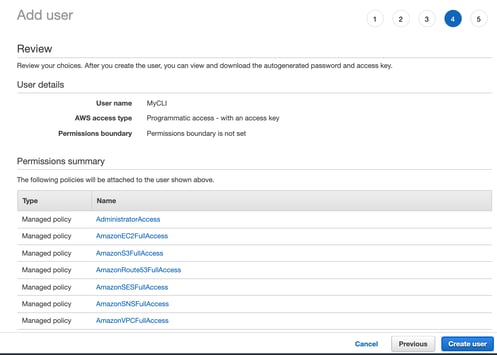
Then I can review the settings and create the user.
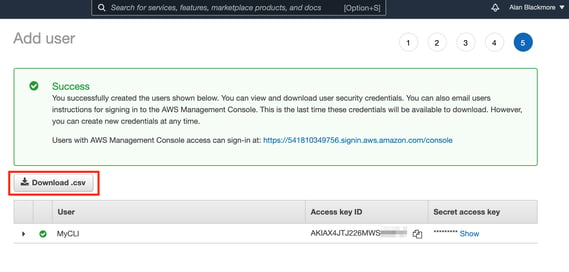
Once the user is created, we need to grab the Access Key ID and the Secret Access Key that is displayed on the success page.
You need to do this now as once you navigate away from this page, the secret key will no longer show anywhere. There is an option to download these details as a CSV, which is the best option.
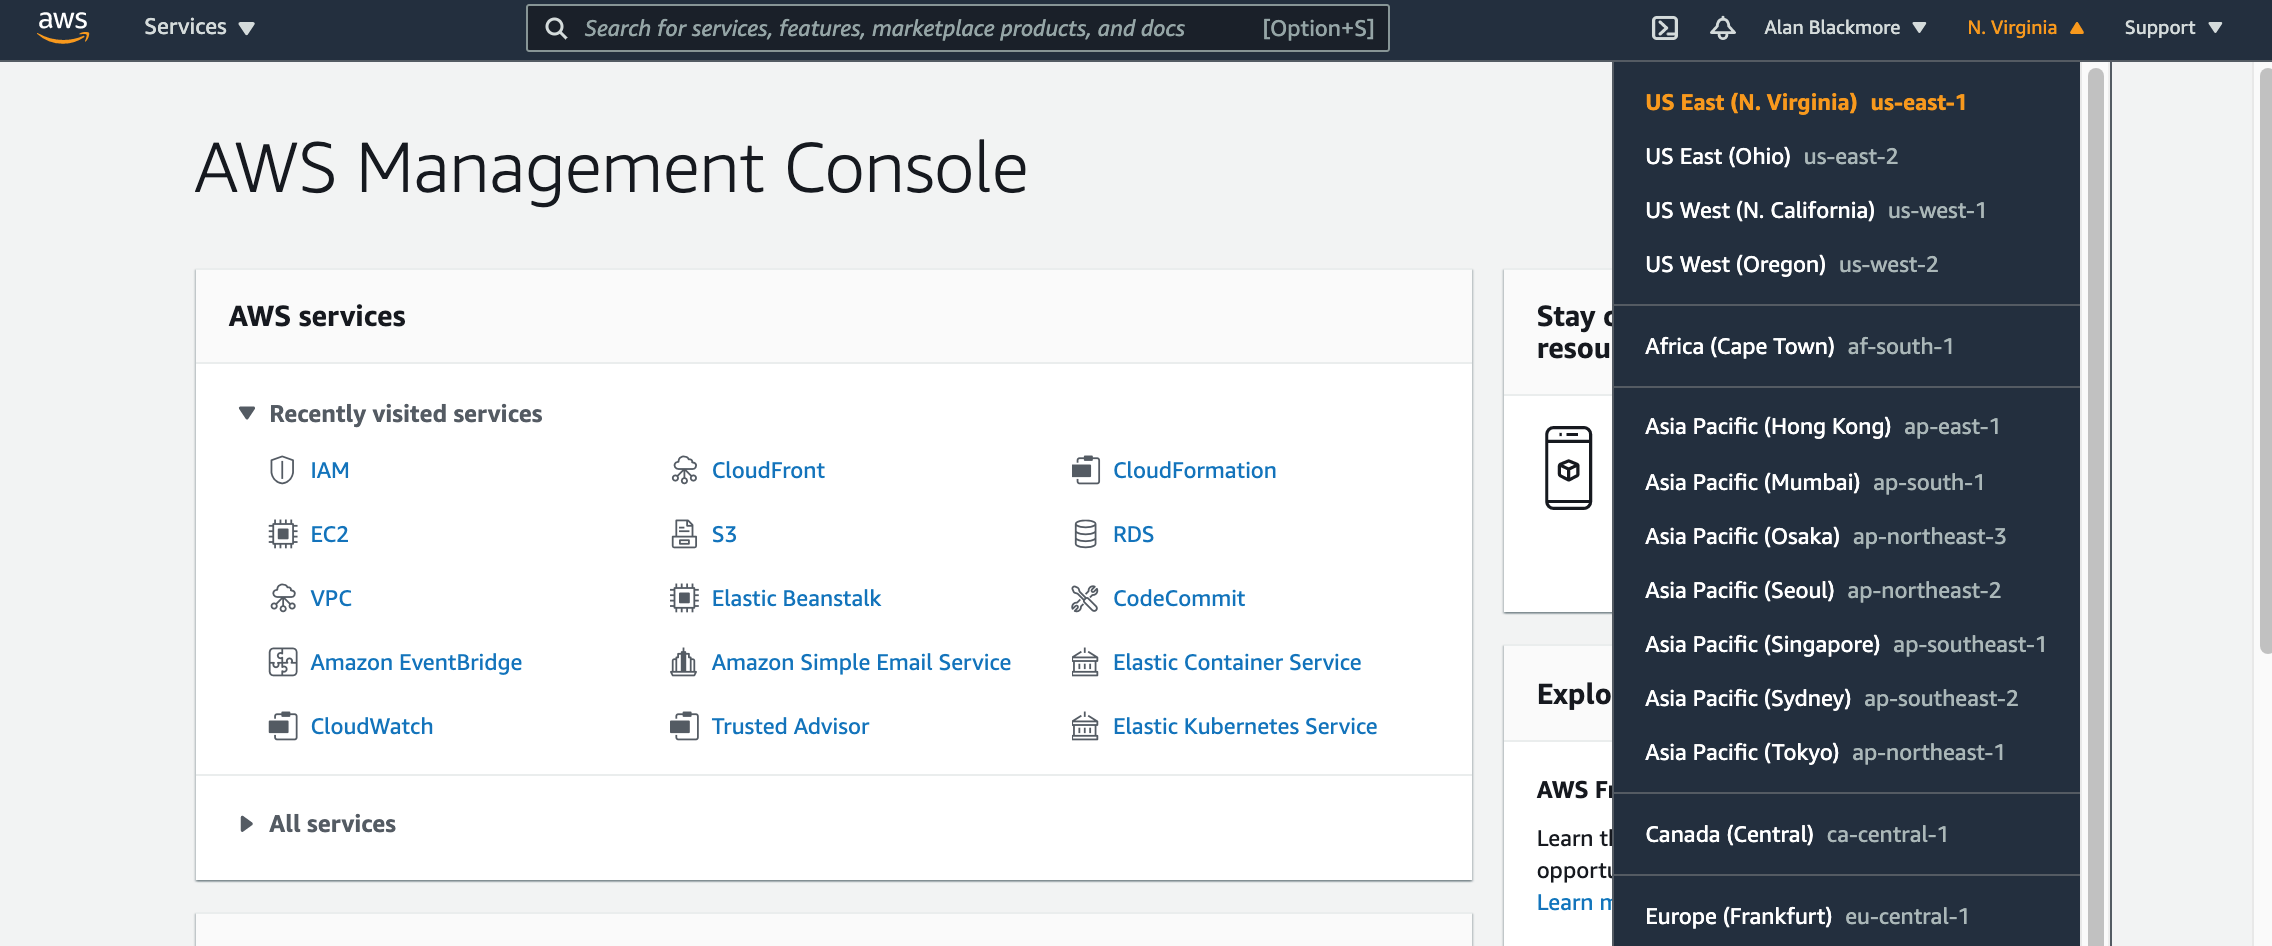
Now you have the IAM credentials, you need to establish which region your account is set up in. The easiest way is to go to the AWS console home page. The region is displayed in the top right of the header menu bar.
In this example, you can see my account is set up in us-east-1
Now we have the necessary information to configure the CLI.
From the terminal window you need to enter “aws configure”
You will then get prompted for the access key id, secret key, region and the output format you would like the CLI to return details in. In the example below, i’ve asked for JSON
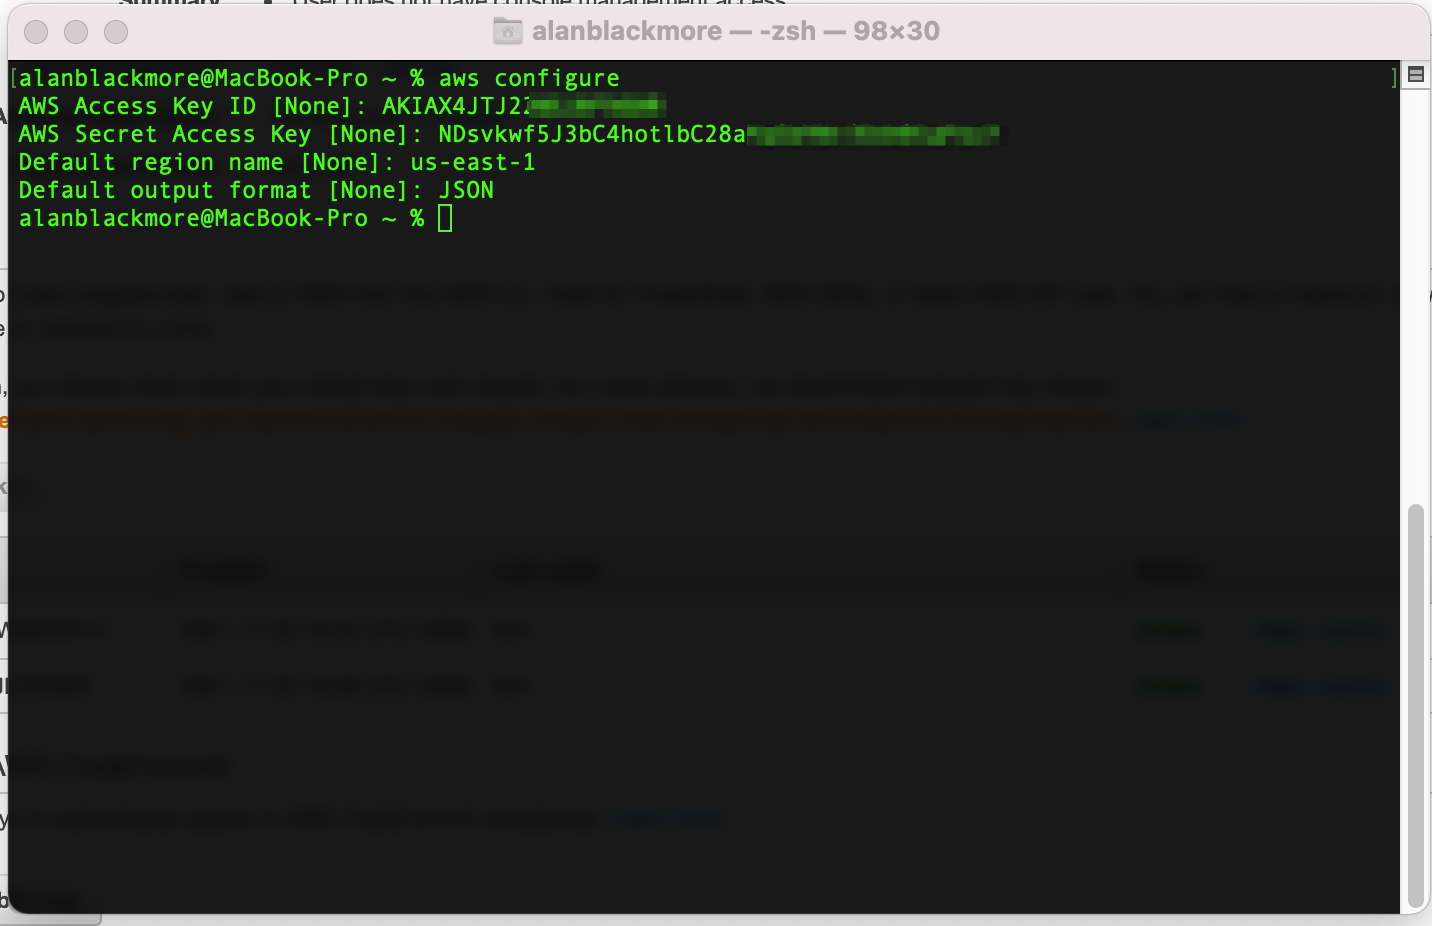
You can think of AWS Configure as the command line interface login. Once logged in, you can start interacting with your AWS resources.
A good starting point is to type “aws help” and read through the help documentation. This will give you a run through of the available options.
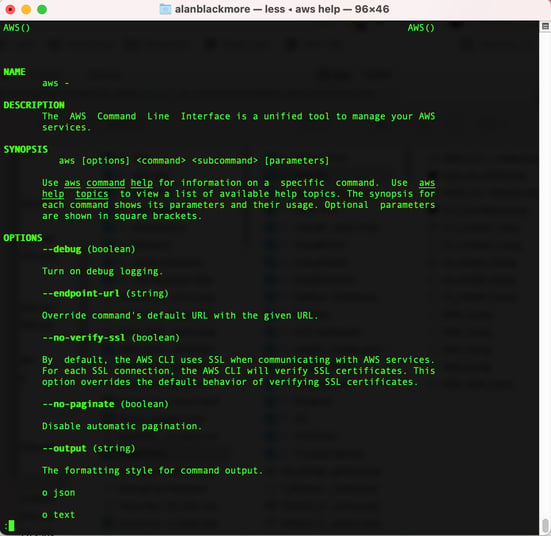
The format of the AWS CLI is:
aws [options] <command> <subcommand> [parameters]
The CLI can be used to interact with most AWS services, these include;
| accessanalyzer | compute-optimizer | greengrass | marketplace-entitlement | s3api |
| account | configservice | greengrassv2 | marketplacecommerceanalytics | s3control |
| acm | configure | groundstation | mediaconnect | s3outposts |
| acm-pca | Connect | guardduty | mediaconvert | sagemaker |
| alexaforbusiness | connect-contact-lens | health | medialive |
sagemaker-a2i-runtime
|
| amp | connectparticipant | healthlake | mediapackage |
sagemaker-edge
|
| amplify | cur | help | mediapackage-vod |
sagemaker-featurestore-runtime
|
| amplifybackend | customer-profiles | history | mediastore |
sagemaker-runtime
|
| apigateway | databrew | honeycode | mediastore-data | savingsplans |
| apigatewaymanagementapi | dataexchange | iam | mediatailor | schemas |
| apigatewayv2 | datapipeline | identitystore | memorydb | sdb |
| appconfig | datasync | imagebuilder | meteringmarketplace |
secretsmanager
|
| appflow | dax | importexport | mgh | securityhub |
| appintegrations | ddb | inspector | mgn | serverlessrepo |
| application-autoscaling | deploy | iot | migrationhub-config | service-quotas |
| application-insights | detective | iot-data | mobile | servicecatalog |
| applicationcostprofiler | devicefarm | iot-jobs-data | mq |
servicecatalog-appregistry
|
| appmesh | devops-guru | iot1click-devices | mturk |
servicediscovery
|
| apprunner | directconnect | iot1click-projects | mwaa | ses |
| appstream | discovery | iotanalytics | neptune | sesv2 |
| appsync | dlm | iotdeviceadvisor | network-firewall | shield |
| athena | dms | iotevents | networkmanager | signer |
| auditmanager | docdb | iotevents-data | nimble | sms |
| autoscaling | ds | iotfleethub | opensearch |
snow-device-management
|
| autoscaling-plans | dynamodb | iotsecuretunneling | opsworks | snowball |
| backup | dynamodbstreams | iotsitewise | opsworks-cm | sns |
| batch | ebs | iotthingsgraph | organizations | sqs |
| braket | ec2 | iotwireless | outposts | ssm |
| budgets | ec2-instance-connect | ivs | panorama | ssm-contacts |
| ce | ecr | kafka | personalize | ssm-incidents |
| chime | ecr-public | kafkaconnect | personalize-events | sso |
| chime-sdk-identity | ecs | kendra | personalize-runtime | sso-admin |
| chime-sdk-messaging | efs | kinesis | pi | sso-oidc |
| cli-dev | eks | kinesis-video-archived-media | pinpoint | stepfunctions |
| cloud9 | elastic-inference | kinesis-video-media | pinpoint-email |
storagegateway
|
| cloudcontrol | elasticache | kinesis-video-signaling | pinpoint-sms-voice | sts |
| clouddirectory | elasticbeanstalk | kinesisanalytics | polly | support |
| cloudformation | elastictranscoder | kinesisanalyticsv2 | pricing | swf |
| cloudfront | elb | kinesisvideo | proton | synthetics |
| cloudhsm | elbv2 | kms | qldb | textract |
| cloudhsmv2 | emr | lakeformation | qldb-session |
timestream-query
|
| cloudsearch | emr-containers | lambda | quicksight |
timestream-write
|
| cloudsearchdomain | es | lex-models | ram | transcribe |
| cloudtrail | events | lex-runtime | rds | transfer |
| cloudwatch | finspace | lexv2-models | rds-data | Translate |
| codeartifact | finspace-data | lexv2-runtime | redshift | voice-id |
| codebuild | firehose | license-manager | redshift-data | waf |
| codecommit | fis | lightsail | rekognition | waf-regional |
| codeguru-reviewer | fms | location | resource-groups | wafv2 |
| codeguruprofiler | forecast | logs | resourcegroupstaggingapi | wellarchitected |
| codepipeline | forecastquery | lookoutequipment | robomaker | wisdom |
| codestar | frauddetector | lookoutmetrics | route53 | workdocs |
| codestar-connections | fsx | lookoutvision | route53-recovery-cluster | worklink |
| codestar-notifications | gamelift | machinelearning | route53-recovery-control-config | workmail |
| cognito-identity | glacier | macie | route53-recovery-readiness |
workmailmessageflow
|
| cognito-idp | globalaccelerator | macie2 | route53domains | workspaces |
| cognito-sync | glue | managedblockchain | route53resolver | xray |
| comprehend | grafana | marketplace-catalog | s3 | |
| comprehendmedical |
You can use the CLI to interrogate your AWS services.
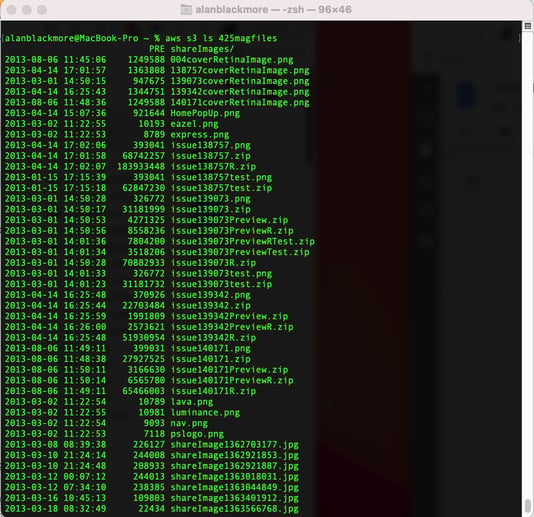
Lets see what S3 buckets I have using “aws s3 ls”

We can also easily list the contents of one of the buckets ie: “aws s3 ls 425magfiles”
You can see all the available commands for each service by typing “aws [service name] help”
Or you can view the CLI documentation here :
https://docs.aws.amazon.com/cli/latest/userguide/cli-chap-welcome.html
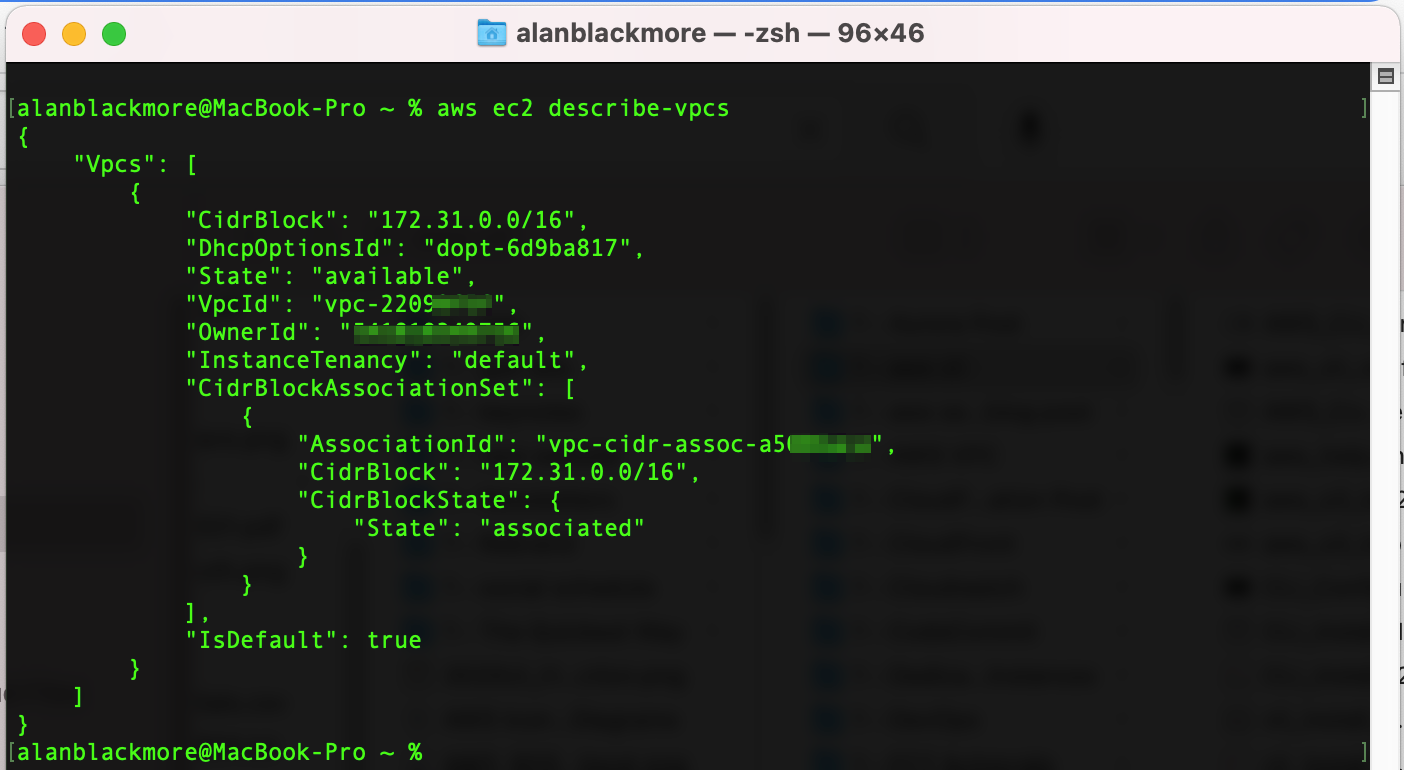
We can for instance list out our VPCs in JSON format (my default) by using the “aws EC2 describe-vpcs” command
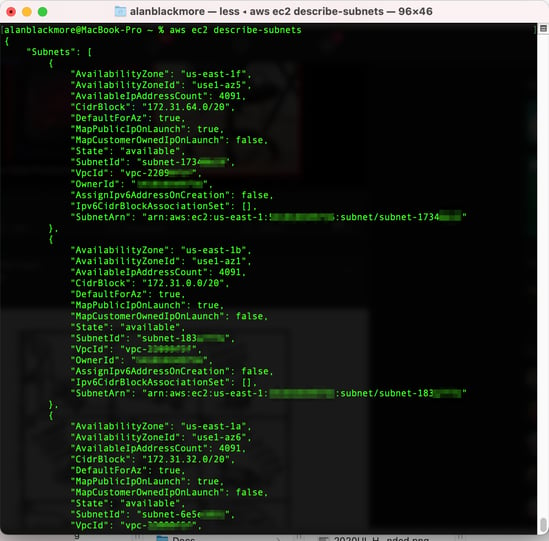
Or look at the subnets I have configured using “aws EC2 describe-subnets”
To see all the available subcommands for a service you can type help after the service name to bring up the CLI help for that service - for instance “aws EC2 help”
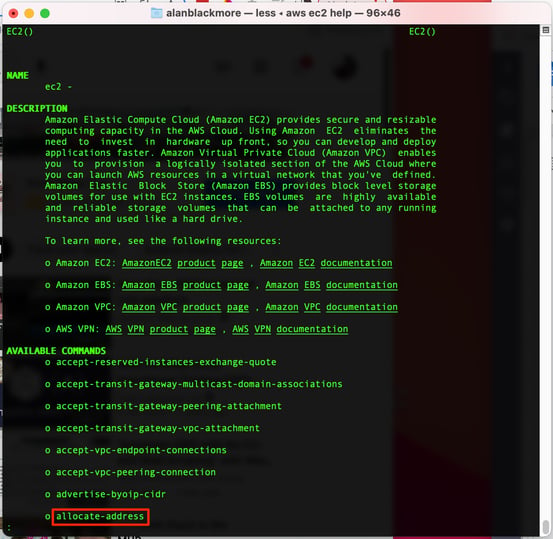
Here you can see the available commands like ‘allocate-address’ which is followed by pages and pages of available commands you can execute from the command line.
So let's do something more practical.
Launch an EC2 Instance using the AWS CLI
To launch an EC2 instance using the CLI we are going to need a key pair, the AMI ID of the EC2 instance type we want to launch and the instance size to launch.
First of all we’ll take a look in the console at the existing keypairs in the EC2 service console.

Now we can use the CLI to create a new Key Pair using :
aws ec2 create-key-pair --key-name MyCLIKeyPair --query 'KeyMaterial' --output text > MyCLIKeyPair.pem
This command will create a new key pair and then save the details locally in the .pem file

Now if we check the key pairs in the EC2 console (after refreshing the page) we can see the freshly created key pair.

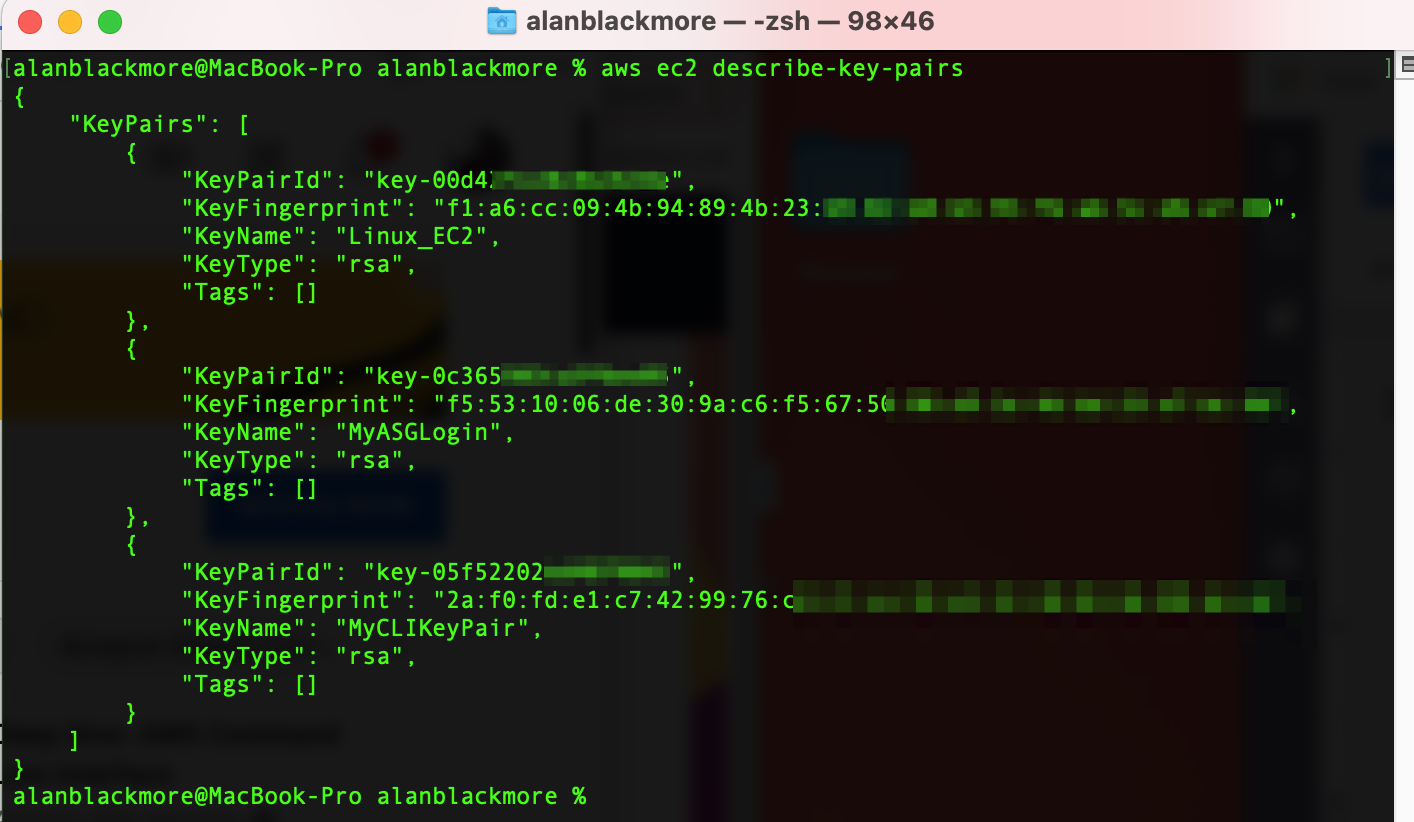
We could also verify this using the CLI using the “aws ec2 describe-key-pairs” command
Now we can get the machine image ID of the EC2 instance we want to create. The easiest way is to go to launch instance in the EC2 dashboard and get to the “Choose an AMI” page and find the machine image type you wish to deploy.
In this example we’ll choose an Amazon Linux 2 AMI (AMI Id - ami-01cc34ab2709337aa)
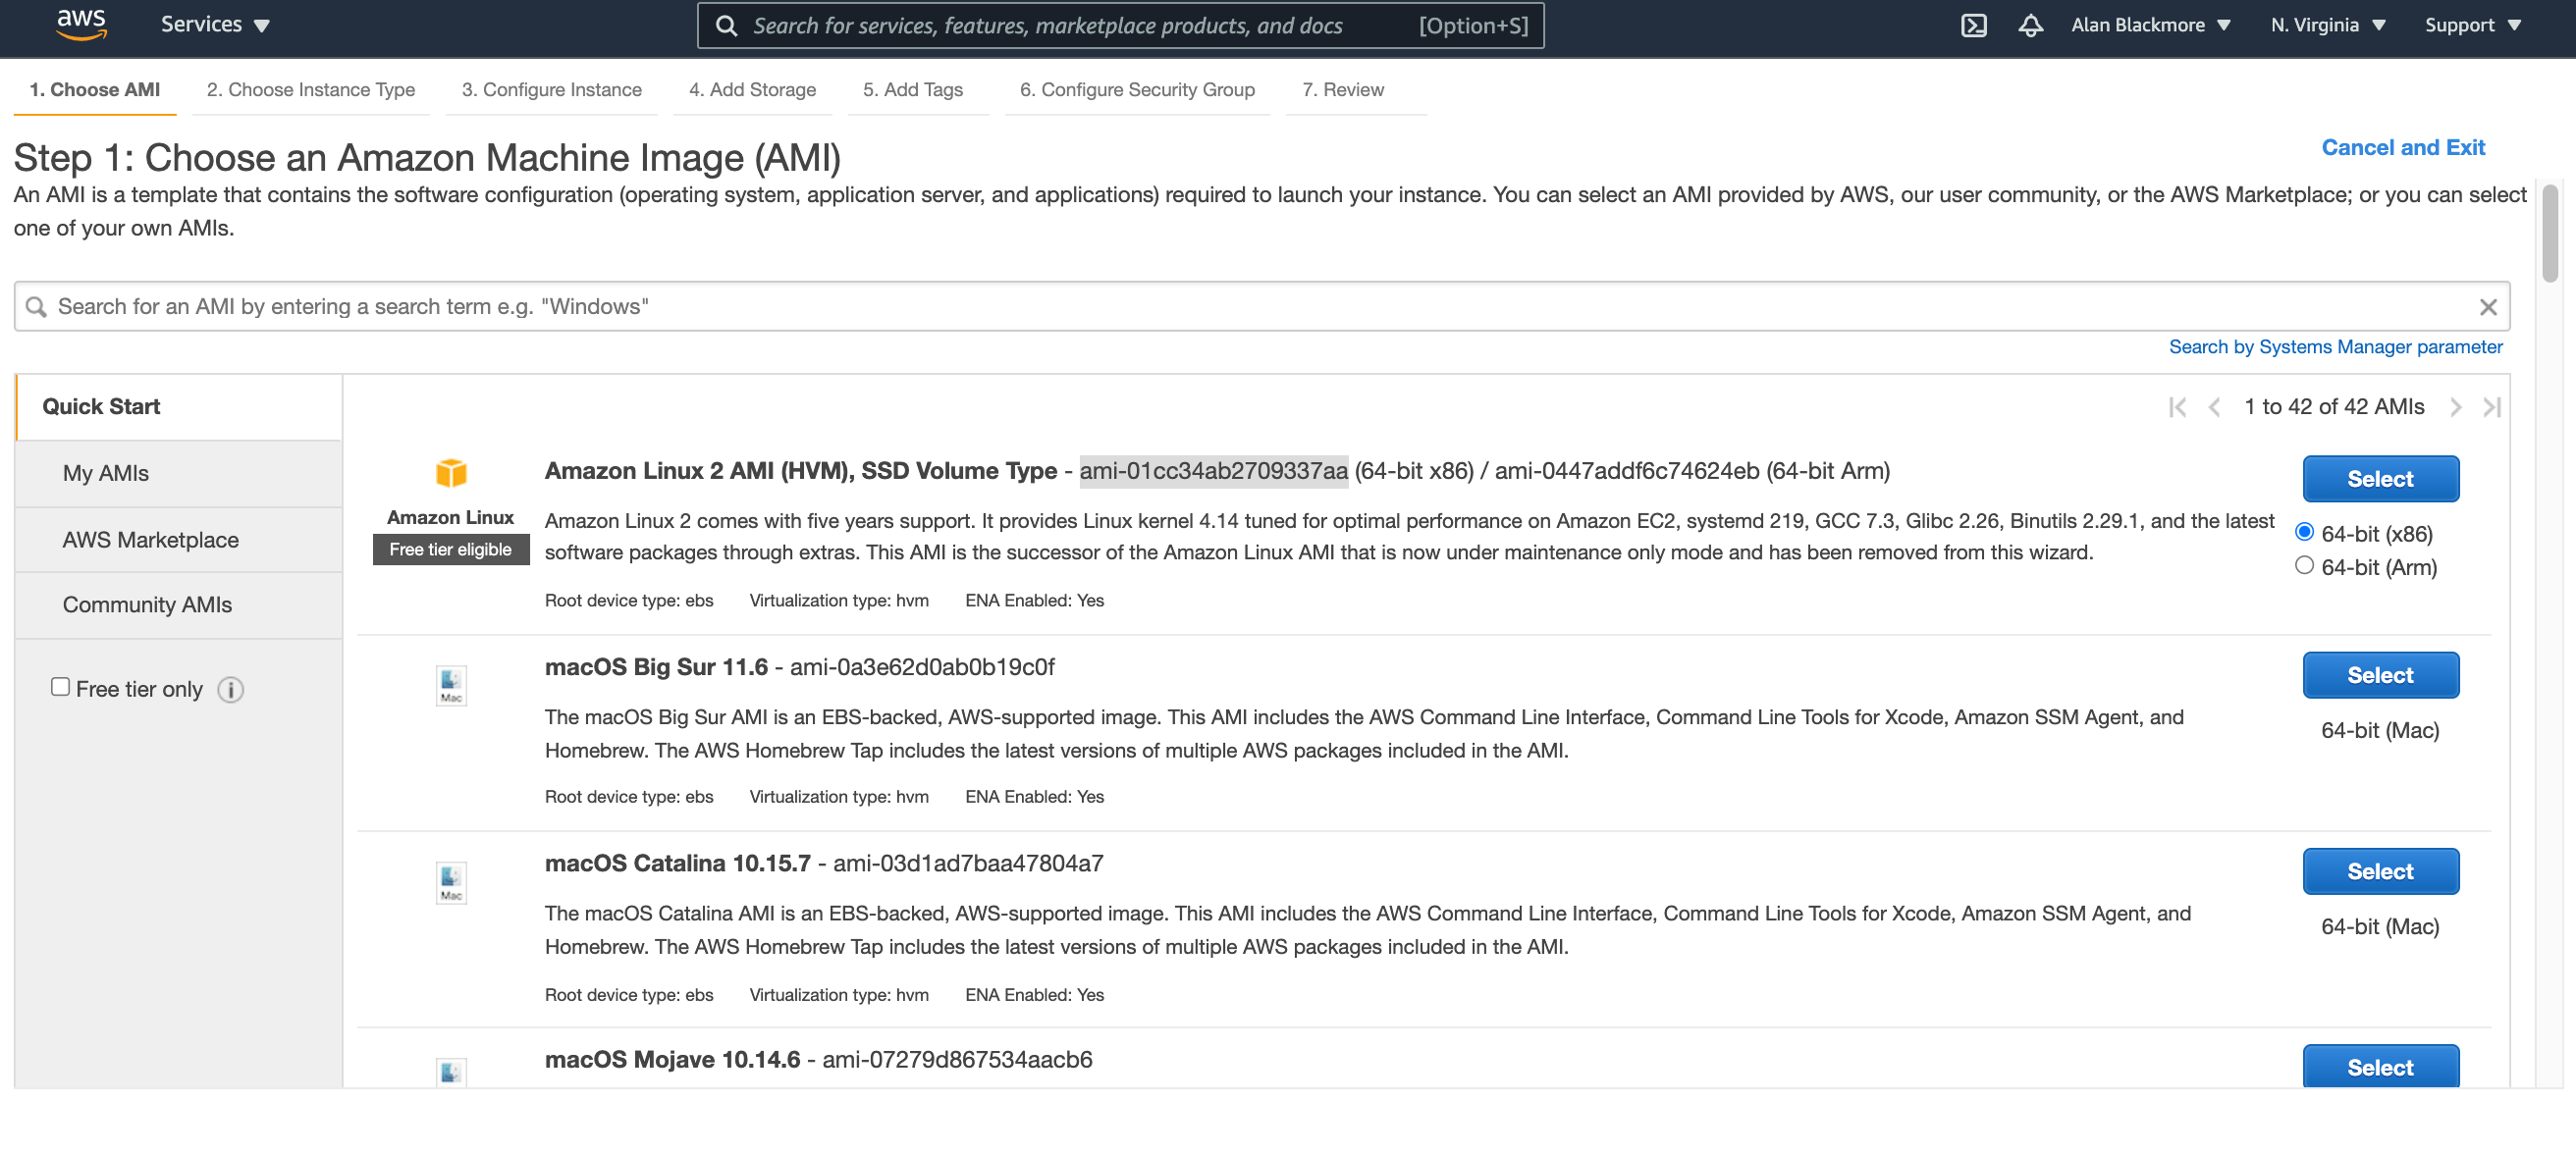
Then if I select it, it will give me a list of the available instance types. In this case, we’ll run with t2.micro
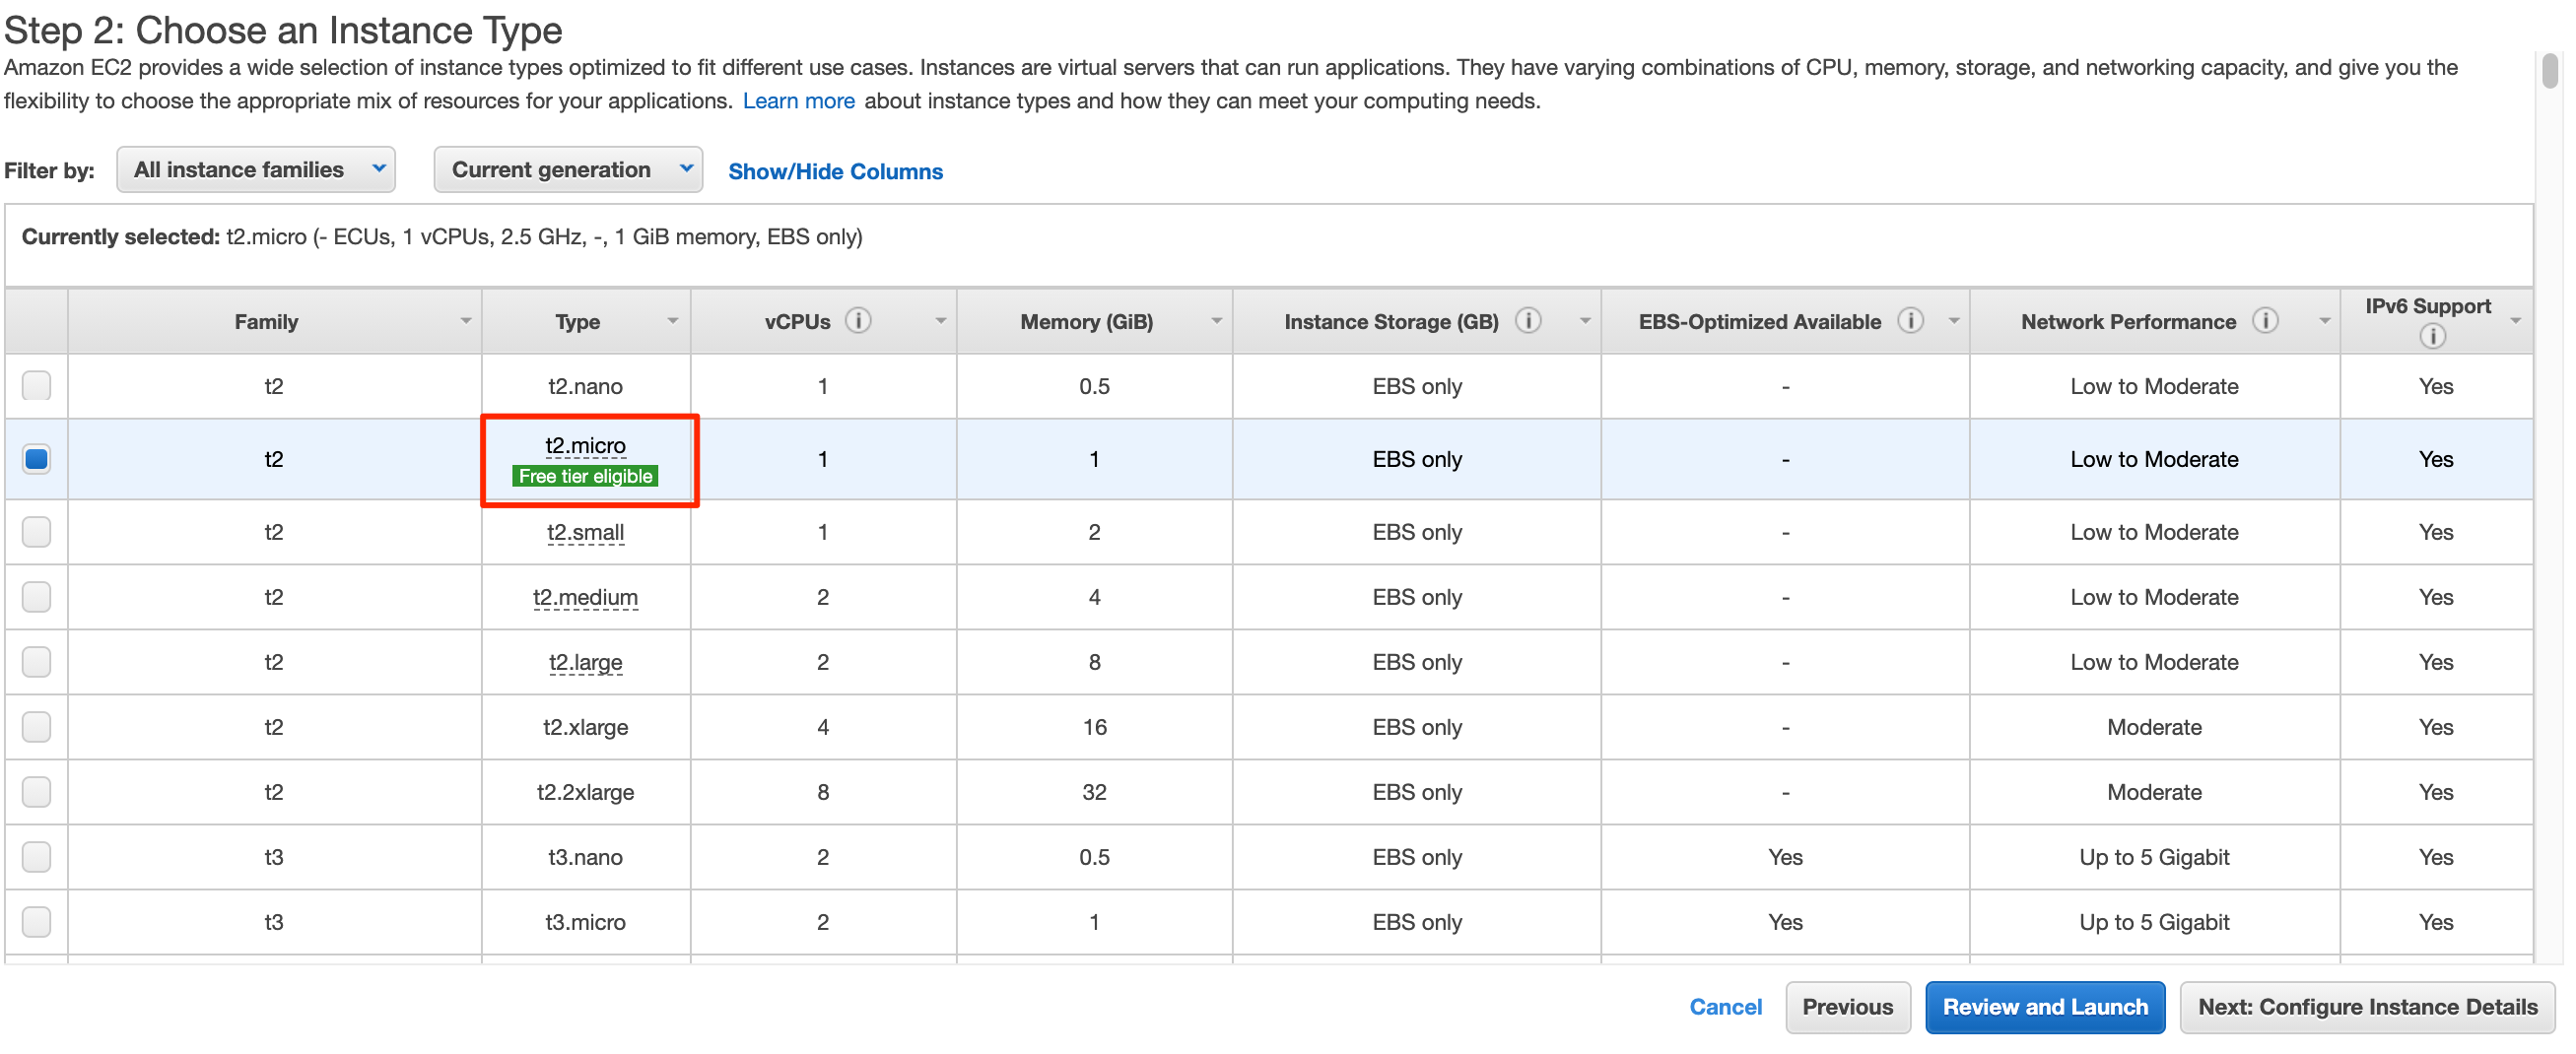 I can now exit out of the launch instance and return to the terminal window armed with the information needed to create the EC2 instance using the CLI
The parameters we will use with the run-instances command will be:
We could also specify a security group, however we’ll omit this so that AWS will use the default security group for our VPC
So if we look at my EC2 instances prior to executing the CLI command:

Now we’ll execute our command:
aws ec2 run-instances --image-id ami-01cc34ab2709337aa --instance-type t2.micro --count 2 --key-name MyCLIKeyPair
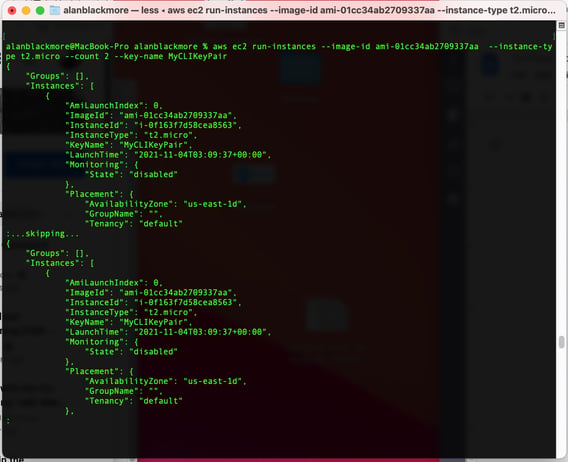
Now in we take a look at the EC2 Instances Dashboard

We could of course use the CLI to view the running instances using “aws ec2 describe-instances” which will return a JSON file with tons of information related to the running EC2 instances.
You can manipulate existing resources from the CLI. Say for example we wanted to add some tags to an existing instance, we could do something like:

Now if we look at the console and refresh, we can see the added tag
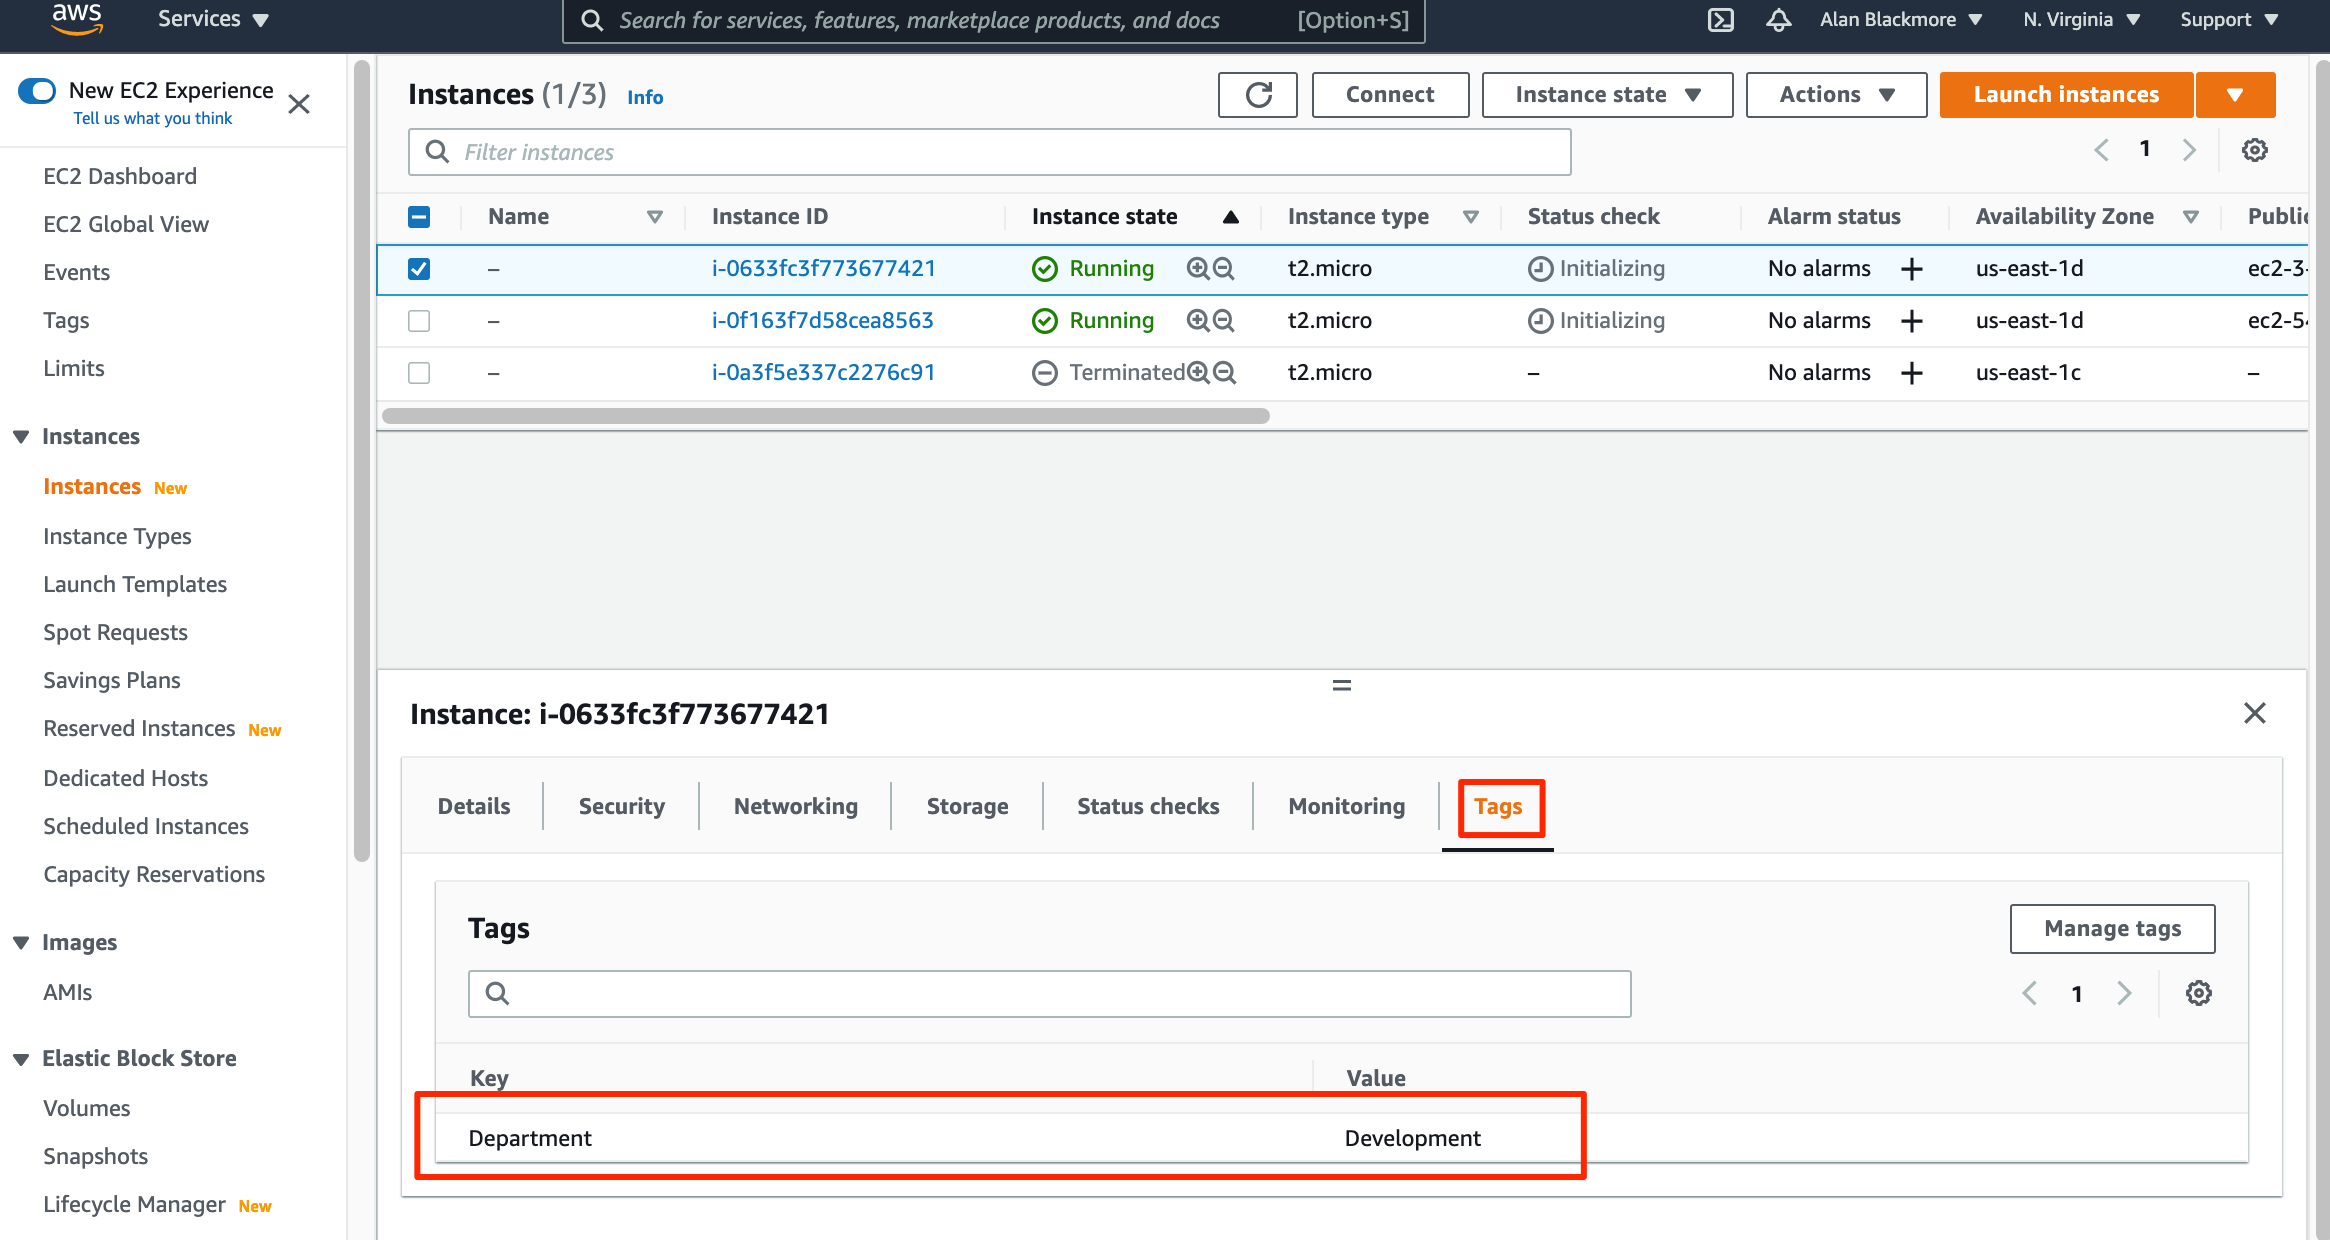
Now Jeff has enough cash to hop on a rocket into space, so we’ll clean up the instances we just created to stop the billing.
We do this using the terminate-instances command:
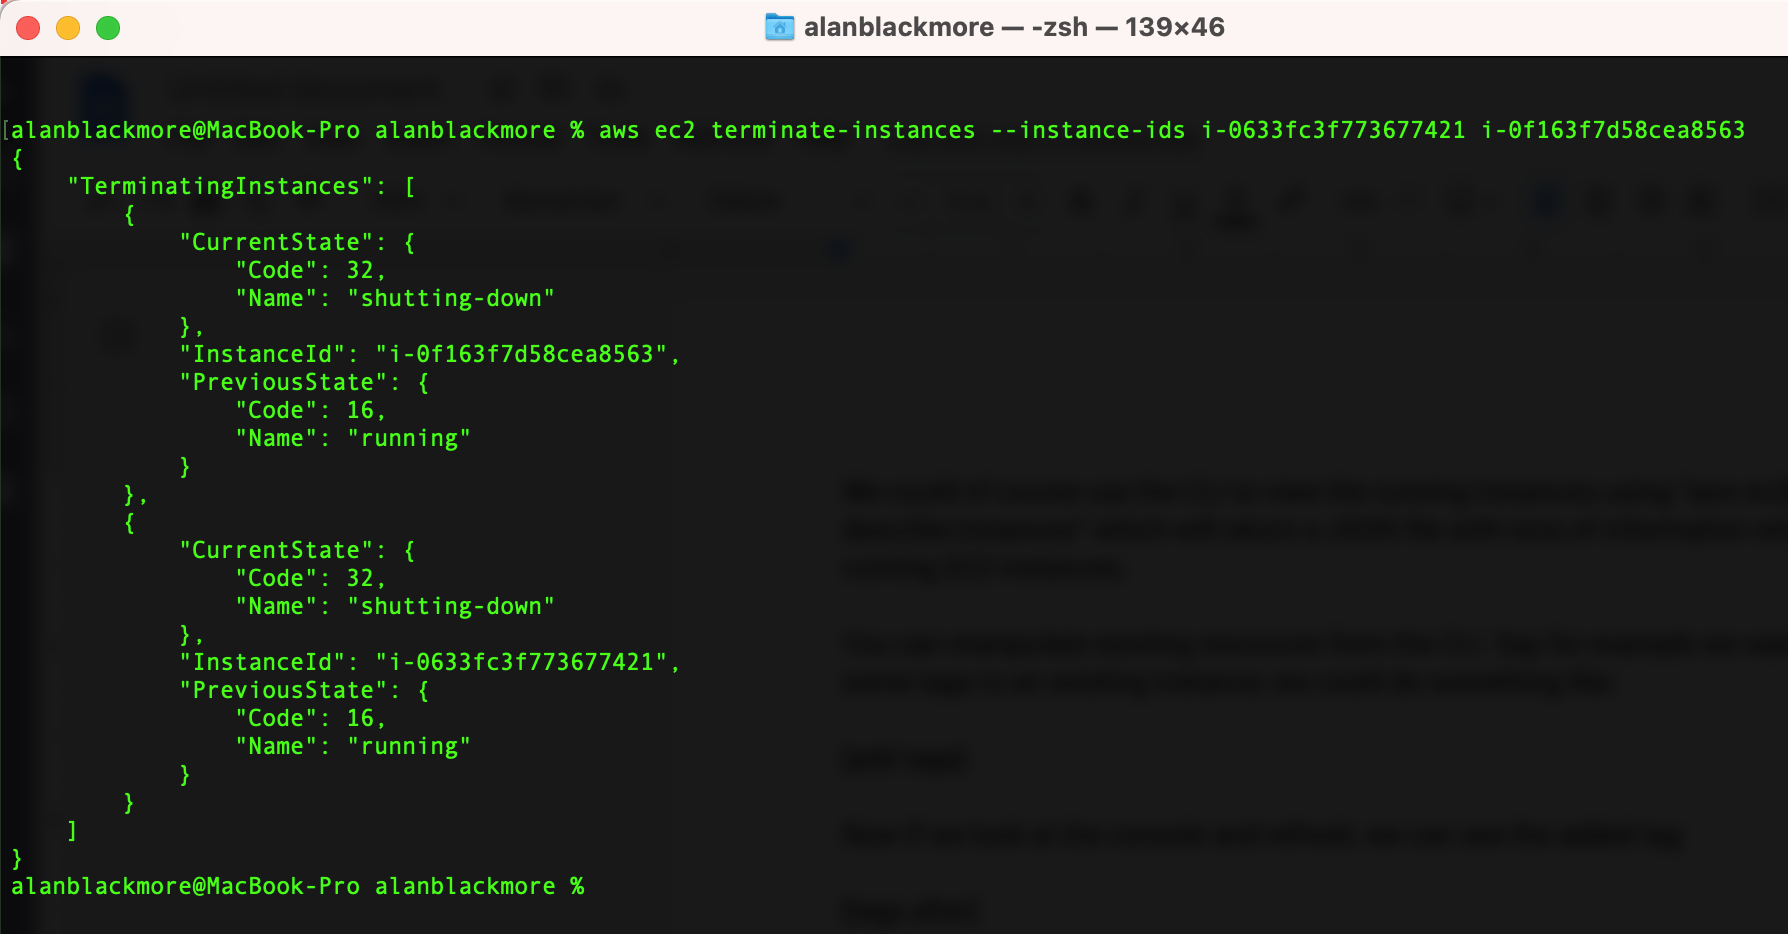
Now if we look into the console, we can see the 2 instances have been terminated.

We can also clean up the key pairs using :
aws ec2 delete-key-pair --key-name MyCLIKeyPair
Using the AWS CLI with S3
Moving files to and from S3 from a local machine is probably one of the major uses of the CLI.
As mentioned previously, we can list all our S3 buckets using:
AWS S3 ls

To create a new bucket we can use the mb (make bucket) command. The bucket name needs to be unique on S3 (not just your account)
aws s3 mb s3://my-hava-backups

Now if we check again, we can see the new bucket has been created.
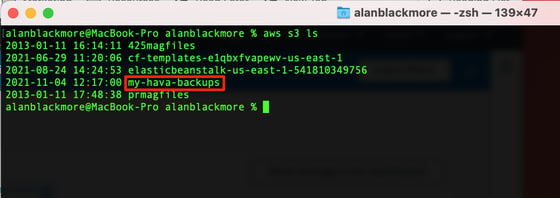
Now you can move files in and out of the bucket using the cp command like:
aws s3 cp localfile.txt s3://my-hava-backups
Or you could request a new folder be created during the copying process/
aws s3 cp localfile.txt s3://my-hava-backups/new-folder
You can use the sync command to move the entire contents of a folder to or from S3
Aws s3 sync Downloads s3://my-hava-backups/downloads-backup
If you delete files locally and repeat the sync process, the files on S3 will not be deleted, however if you add the delete flag, the sync process will remove any files in S3 that are no longer present in your local folder:
Aws s3 sync Downloads s3://my-hava-backups/downloads-backup --delete
To retrieve files back from S3 to your local machine, you simply reverse the source and the target
Aws s3 sync s3://my-hava-backups/downloads-backup Downloads
Other popular S3 CLI commands are:
rm - delete a file
mv - move a file
To clean up the bucket, we’ll need to use the “rb” remove bucket command. As a default, aws will not allow you to remove a bucket that has any files in it. If we attempted to rb a bucket with contents, we would get a “The bucket you tried to delete is not empty” error.
You can utilise the --force flag to delete a bucket with files in it.

So there we have it, a quick run through of the AWS Command Line Interface and some of the typical commands you are likely to encounter.
You can get more in depth details of all the commands available in the AWS CLI user guide which you can find here : https://docs.aws.amazon.com/cli/latest/userguide/cli-chap-welcome.html
If you are building on AWS and would like to automate your network topology diagrams and security group diagrams by simply attaching a cross-account role to Hava, we invite you to take a free trial using the button below.
Use this AWS CLI Command Reference Guide to view all the available commands in the AWS Command Line Interface from L - Z. Each command details the...
Use this AWS CLI Command Reference Guide to view all the available commands in the AWS Command Line Interface from A - K. Each command details the...
Amazon Security Token Service or STS provides temporary credentials for authenticated users or services like Lambda or EC2 to access AWS resources...